Yaki Onigiri is the ultimate comfort food for anyone who craves the perfect contrast between a shatter-crisp exterior and a soft, fluffy interior. If you have ever marveled at the golden-brown, charred crust of Japanese grilled rice balls in a high-end izakaya, you know that the secret lies in the balance of sweet, salty umami and high-heat caramelization.
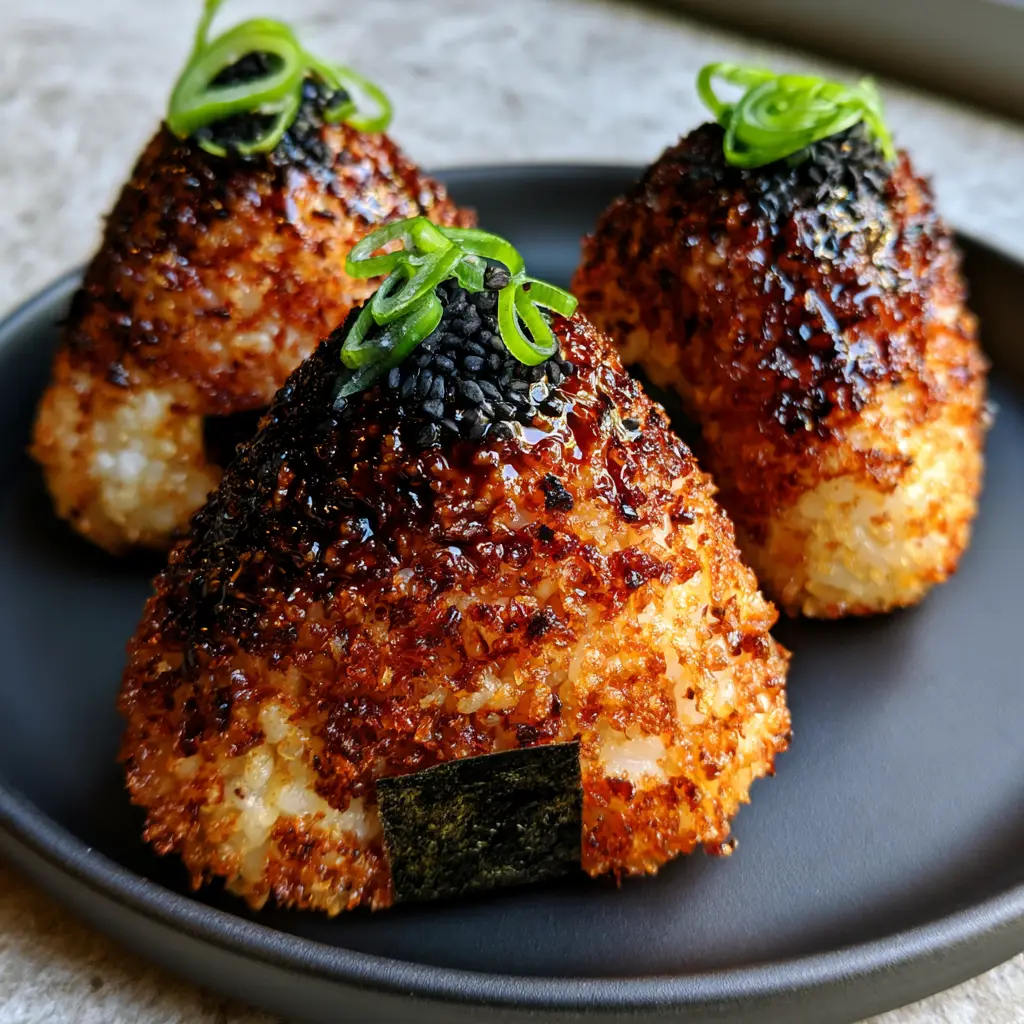
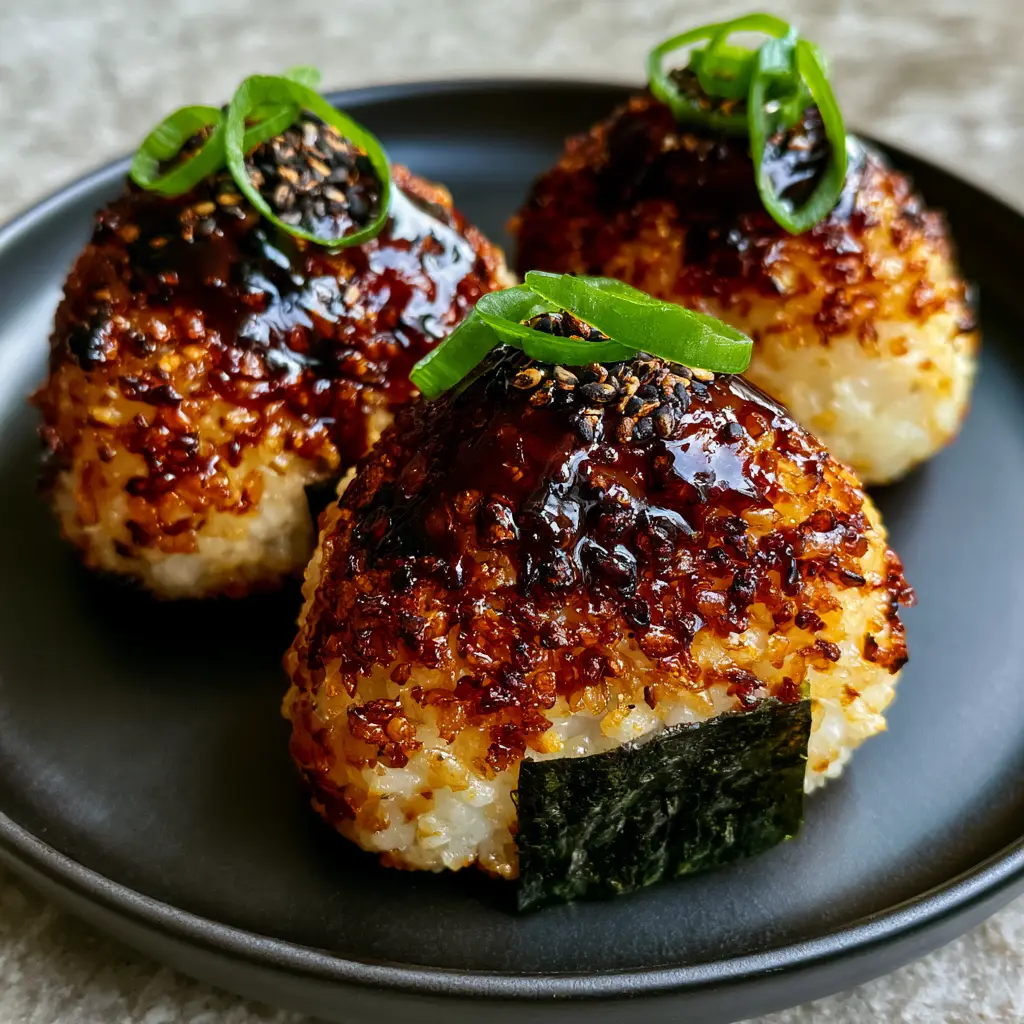
In this guide, we are bringing that professional culinary experience into your home kitchen using an air fryer. By leveraging modern convection technology, we can achieve that iconic “handheld smartphone photo” aesthetic—three perfectly triangular rice balls with a deeply toasted crust that looks as good as it tastes. Every bite delivers a crunch that echoes through the room, followed by the rich, glossy finish of a dark miso soy glaze.
Whether you are looking for a satisfying snack or a unique side dish to pair with your favorite quick seafood dishes, this Yaki Onigiri recipe is designed to impress. We have meticulously engineered this recipe to match the visual perfection of a minimalist ceramic plate presentation, complete with vibrant scallions and toasted black sesame seeds.
Why This Air-Fried Crispy Rice Recipe Works
- Shatter-Crisp Texture: The air fryer circulates hot air to dehydrate the surface of the short-grain rice, creating a crust that stays crunchy for hours.
- Umami-Rich Glaze: We use a specific ratio of red miso and dark soy sauce to achieve a glistening, dark brown finish that reflects natural light beautifully.
- Structural Integrity: By using high-starch short-grain rice, these triangles hold their shape without falling apart during the flipping process.
- Visual Precision: From the paper-thin green scallion rings to the precise nori wrap, this dish is a masterclass in culinary aesthetics.
Essential Components for Umami-Packed Rice Balls
To achieve the “forensic visual accuracy” of our blueprint, you must use specific ingredients that react to heat in predictable ways. Do not substitute the rice type, as long-grain varieties lack the necessary amylopectin to stick together.
Short-Grain White Rice: 2 cups (400g) of uncooked Japanese sushi rice is the foundation. Its high starch content is what allows the individual grains to fuse into a solid triangle that can withstand the air fryer’s fan.
Red Miso Paste: 2 tbsp (30g) of fermented soybean paste provides the deep, dark brown color and the base of our umami profile. Red miso (aka miso) is aged longer than white miso, offering a more robust flavor that stands up to charring.
Dark Soy Sauce: 1 tbsp (15ml) adds both salinity and that “glossy dark brown” visual confirmed in our blueprint. It contains more molasses than light soy sauce, which aids in the caramelization process.
Mirin: 1 tbsp (15ml) of Japanese sweet rice wine. The sugar content in mirin is crucial for achieving the “glistening” reflection seen in high-end food photography.
Toasted Sesame Oil: 1 tsp (5ml) acts as a lubricant for the rice and adds a nutty aromatic layer. It also helps the heat distribute evenly across the surface of the rice balls.
Toasted Black Sesame Seeds: 1 tsp (5g) for the meticulous garnish. These provide a sharp visual contrast against the golden-brown crust.
Fresh Scallions: 2 medium stalks, sliced into paper-thin rings. The vibrant green adds a necessary pop of color to the neutral limestone countertop aesthetic.
Dried Nori Seaweed: 1 large sheet, cut into 1-inch (2.5cm) by 3-inch (7.5cm) strips. This serves as the functional “handle” for the Yaki Onigiri, preventing your fingers from getting sticky.
Neutral Oil Spray: A light coating of avocado or grapeseed oil is the “invisible” ingredient that ensures the rice grains become “shatter-crisp” rather than just hard.
Professional Tools for Shaping and Frying
Achieving the perfect Yaki Onigiri requires more than just ingredients; you need the right tools to manage the moisture and heat. A triangular onigiri mold is highly recommended for home cooks who want that “minimalist ceramic plate” uniformity, though hand-shaping is traditional.
You will also need a high-quality air fryer with a basket that allows for maximum airflow. A silicone pastry brush is essential for the “artful brushing” of the miso glaze, ensuring you don’t disturb the delicate crust. Finally, a sharp chef’s knife is required to get those scallions thin enough to look like “vibrant green rings.”
The Step-by-Step Evolution of Yaki Onigiri
Preparing the High-Starch Rice Base
Start by rinsing your 2 cups (400g) of short-grain rice under cold water until the water runs clear. This removes excess surface starch that can make the rice gummy rather than fluffy.
Cook the rice with 2 cups (480ml) of water in a rice cooker or heavy-bottomed pot. Once cooked, let the rice steam for 10 minutes; this “setting” phase is critical so the grains don’t burst when you shape them into the signature Yaki Onigiri triangles.
While the rice is warm, fold in a pinch of salt. Do not use rice vinegar here, as we are not making sushi; we want the pure, clean flavor of toasted rice to shine through.
Shaping the Iconic Triangles
Wet your hands with salted water to prevent sticking. Take about 1/2 cup (120g) of warm rice and compress it firmly into a thick triangle, roughly 1.5 inches (4cm) thick.
The edges must be sharp and the faces flat to ensure even contact with the air fryer’s heat. If the rice is too loose, the Yaki Onigiri will crumble; if too tight, it will become a dense brick. Aim for a firm but airy texture.
The First Air Fry: Building the Shatter-Crisp Crust
Preheat your air fryer to 400°F (200°C). Lightly spray the air fryer basket and both sides of the rice balls with neutral oil.
Place the triangles in the basket, ensuring they do not touch. Air fry for 8-10 minutes, flipping halfway through. You are looking for a “toasted golden-brown rice crust” where the individual grains look slightly dehydrated and crisp.
Glazing for Color and Umami
Whisk together the miso, soy sauce, mirin, and sesame oil in a small bowl. Using your pastry brush, apply a thick, artful layer of the glaze to the top surface of each rice ball.
Return them to the air fryer for another 2-3 minutes at 400°F (200°C). Watch for the “slightly charred” edges and a “glossy dark brown” sheen. The sugar in the mirin will bubble and caramelize into a savory lacquer.
Final Garnish and Presentation
Remove the Yaki Onigiri carefully. While the glaze is still tacky, add a meticulous pinch of toasted black sesame seeds to the center of each triangle.
Top with 3-4 rings of thinly sliced green scallions. Finally, wrap the bottom base with a crisp strip of nori. The heat from the rice will help the nori adhere slightly, creating a professional lifestyle aesthetic.
Expert Tips for Success
- Use Freshly Cooked Rice: Cold, leftover rice is too dry and will not hold the triangular shape. Always shape Yaki Onigiri while the rice is still warm.
- The Double-Fry Secret: Never glaze the rice balls at the beginning. The wet glaze prevents the rice from crisping up. Always build the crust first, then add the glaze.
- Temperature Control: If your air fryer runs hot, drop the temperature to 375°F (190°C) to avoid burning the miso, which can turn bitter if scorched too deeply.
- Salted Water: Keeping a bowl of salted water nearby for your hands is the only way to shape these without the rice sticking to your skin.
Storage, Reheating, and Freezing
Yaki Onigiri are best served immediately to enjoy the “shatter-crisp” texture. However, they can be stored in an airtight container in the refrigerator for up to 2 days.
To reheat, return them to the air fryer at 350°F (175°C) for 5 minutes. Avoid the microwave, as it will turn the crispy crust into a rubbery mess. For long-term storage, you can freeze the shaped (but un-fried) rice balls for up to a month.
What to Serve With This
These savory rice balls are incredibly versatile. For a complete Japanese-inspired lunch, serve them alongside a warm bowl of spicy buldak noodles for a fiery contrast. If you prefer something lighter, they pair beautifully with a crisp lebanese tabbouleh recipe, where the parsley freshness cuts through the dense miso umami.
If you are planning a themed event, consider adding these to a mini wedding menu as a sophisticated, handheld appetizer. They also make a fantastic addition to Ramadan meal prep, providing a slow-release carbohydrate source that stays satisfying for hours.
Frequently Asked Questions
No, jasmine rice is too low in starch and will crumble when fried. Always use short-grain Japanese sushi rice to ensure the triangles hold their shape.
You can shape the rice triangles in advance and store them in the fridge. For the best texture, always air fry and glaze them just before serving.
While an onigiri mold ensures perfect uniformity for photos, you can easily shape them by hand using a cupped-palm technique to form the three corners.
Keep a small bowl of salted water nearby. Lightly wetting your hands before shaping each onigiri prevents sticking and seasons the exterior of the rice.
Miso contains sugars that burn quickly. Only brush the glaze on during the last 2-3 minutes of air frying to achieve a char without a bitter taste.
The Perfect Crispy Yaki Onigiri Recipe
Yaki Onigiri: The Ultimate Air-Fried Crispy Miso Rice Ball Recipe
Ingredients
Equipment
Method
- Rinse short-grain rice until water is clear. Cook with 2 cups (480ml) water and steam for 10 minutes.
- With wet, salted hands, compress 1/2 cup (120g) of warm rice into a firm triangular shape about 1.5 inches (4cm) thick.
- Preheat air fryer to 400°F (200°C). Spray rice balls with neutral oil and air fry for 8-10 minutes, flipping halfway, until a golden-brown crust forms.
- Brush the miso soy glaze artfully over the top. Air fry for 2-3 more minutes until glistening and slightly charred.
- Top with toasted black sesame seeds and sliced scallions. Wrap the base with a strip of nori seaweed.
Notes
Apply the glaze only in the last few minutes of cooking to prevent burning.
Closing & Call to Action
Mastering the art of Yaki Onigiri is a rewarding journey into the textures of Japanese cuisine. The combination of the shatter-crisp rice and the deep umami of the miso glaze creates a sensory experience that is hard to beat. We hope this recipe helps you achieve that high-end lifestyle aesthetic in your own kitchen!
If you enjoyed this recipe, please leave a comment below and let us know how your rice balls turned out! Don’t forget to share your creations and follow us on Pinterest for more culinary inspiration and visual recipe blueprints.