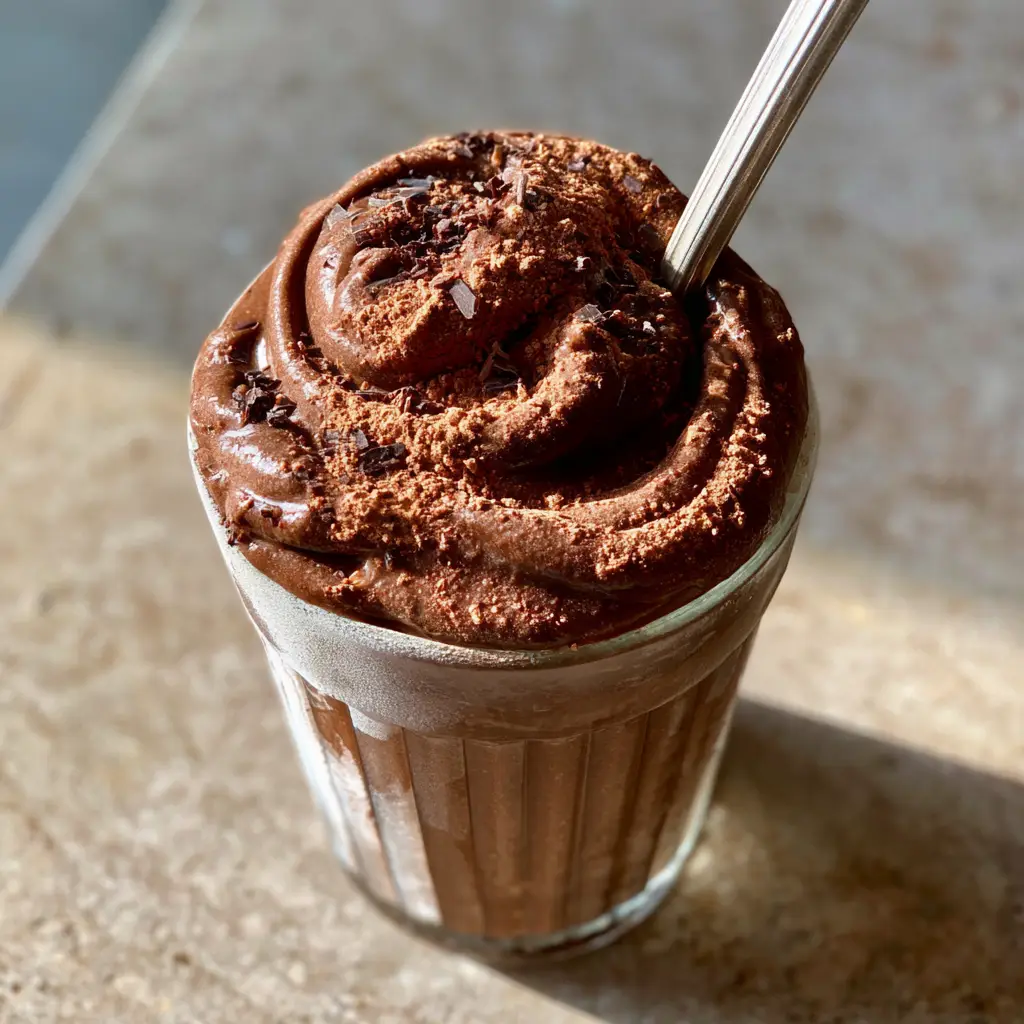
When searching for the ultimate chocolate milkshake recipes, most home cooks encounter the same disappointing result: a thin, runny liquid that melts before the first sip. This recipe changes the narrative by focusing on a “dry-blend” technique that creates a matte, velvety texture so dense a heavy silver spoon stands perfectly upright in the glass. Inspired by high-end artisanal creameries, this shake isn’t just a drink; it is a sculpted dessert experience featuring dark alkalized cocoa swirls and premium 70 percent dark chocolate bits.
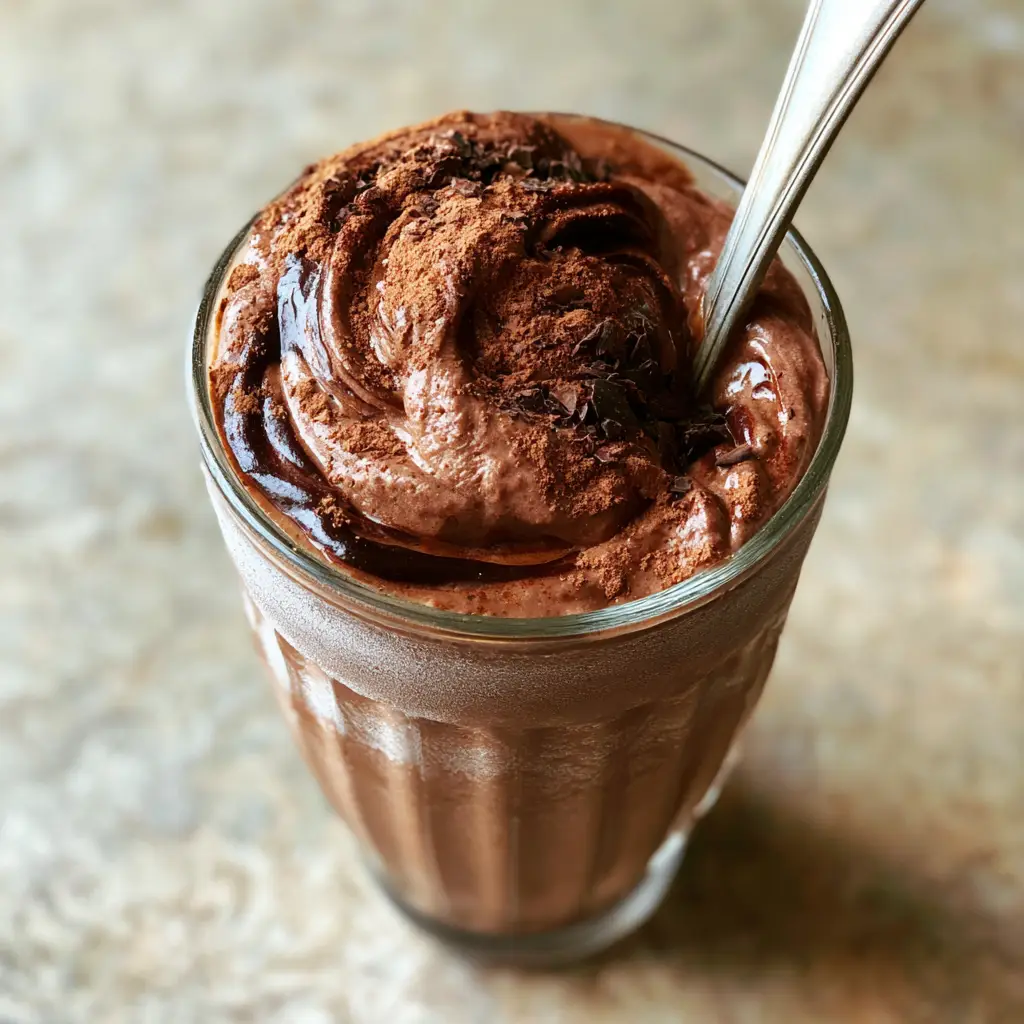
The visual appeal of this shake is defined by its deep, sculpted ripples and a heavy dusting of raw cocoa that absorbs light rather than reflecting it. Unlike standard chocolate milkshake recipes that rely on chocolate syrup, we utilize the structural integrity of frozen premium vanilla bean ice cream as a canvas for intense dark chocolate infusions. The result is a frost-covered glass filled with a chocolate masterpiece that maintains its shape even under the warmth of natural side-lighting.
Why This Ultra-Thick Dry-Blend Recipe Stands Alone
- Extreme Structural Integrity: The “dry-blend” method ensures zero liquid milk is visible, allowing a heavy spoon to stand upright without support.
- Sophisticated Matte Finish: By using alkalized (Dutch-processed) cocoa, we achieve a velvety, non-glossy appearance that looks stunning in a vintage ribbed glass.
- Complex Flavor Profile: The contrast between the floral notes of vanilla bean ice cream and the bitter intensity of 70% dark chocolate shavings creates a professional-grade palate.
- Forensic Visual Precision: Every element, from the frost on the glass to the deep shadows in the chocolate ripples, is designed for high-end food blog aesthetics.
The Foundation: Ingredients for the Perfect Dense Texture
To achieve the specific matte and velvety result described in our visual blueprint, you must select ingredients based on their fat content and particle size. Standard grocery store ice cream often contains too much “overrun” (air), which will cause your shake to collapse.
Premium Vanilla Bean Ice Cream: 3 cups (approx. 450g) of high-fat, ultra-premium vanilla bean ice cream. This serves as the structural base, providing the necessary density to support the heavy spoon and creating the canvas for the dark swirls.
Dark Alkalized Cocoa Powder: 3 tbsp (21g) of Dutch-processed cocoa powder. This ingredient is critical for achieving the matte, deep-shadowed texture and providing the raw, sculpted swirls on the surface.
70% Dark Chocolate Shavings: 2 tbsp (15g) of finely shaved 70% dark chocolate. These flecks provide a necessary textural contrast and a professional, high-end finish to the “dry-blend” surface.
Foundational Sea Salt: A tiny pinch (approx. 1/8 tsp) of fine sea salt. While invisible to the eye, salt is scientifically required to suppress the bitterness of the dark cocoa while amplifying the richness of the vanilla bean base.
Optional Heavy Cream: 1 tbsp (15ml) of heavy whipping cream. Use this only if your blender struggles; it adds fat without the thinning effect of milk, preserving the “zero liquid milk” visual requirement.
Essential Tools for Sculpting Your Chocolate Masterpiece
Achieving the visual cues of a vintage ribbed glass with a frost-covered exterior requires more than just a blender. You need the right tools to handle a mixture that is significantly thicker than standard chocolate milkshake recipes.
A high-powered professional blender with a tamper is highly recommended. Because this recipe uses a “dry-blend” approach, the tamper allows you to push the frozen ice cream into the blades without adding excess liquid. If you do not have a tamper, a heavy-duty food processor is an excellent alternative for maintaining that matte, sculpted texture.
You will also need a vintage ribbed glass, which should be placed in the deepest part of your freezer for at least 30 minutes prior to assembly. This ensures the “slight frost” appears immediately when the cold shake hits the glass. Finally, source a heavy stainless steel spoon—the weight is essential to prove the density of your creation.
The Science of the Dry-Blend: Step-by-Step Instructions
Phase 1: Pre-Chilling and Prep
Place your vintage ribbed glass in the freezer. For the best “frost-covered” effect, rinse the glass quickly with cold water before freezing so a thin layer of ice forms on the ridges. Shave your 70% dark chocolate using a fine grater or a sharp chef’s knife, ensuring the bits are small enough to be scattered delicately.
Phase 2: The Primary Blend
Add the 3 cups (450g) of premium vanilla bean ice cream and the pinch of sea salt to your blender. If you are looking for a break from sweets later, you might consider how these flavor profiles contrast with easy seafood recipes or even a savory caramelized onion pasta. Pulse the ice cream on low speed, using the tamper to press it down. The goal is to reach a soft-serve consistency that is still extremely thick and shows no signs of melting into a liquid state.
Phase 3: Incorporating the Matte Swirls
Once the base is smooth but dense, add 2 tbsp (14g) of the alkalized cocoa powder. Pulse only 2 or 3 times. You do not want a uniform brown color; you want to see distinct, deep, sculpted swirls of dark chocolate throughout the mixture. This creates the “deep shadows” mentioned in the visual prompt, giving the shake a three-dimensional appearance.
Phase 4: Assembly and Garnishing
Spoon the mixture into your chilled glass. The texture should be so thick that you have to “sculpt” it into the glass rather than pour it. Dust the remaining 1 tbsp (7g) of cocoa powder over the top, then scatter the 70% dark chocolate shavings. Finally, bury your heavy stainless steel spoon halfway into the center. It should stand perfectly upright, demonstrating the extreme thickness of the shake.
Expert Tips for Success with Chocolate Milkshake Recipes
- The Temperature Factor: Ensure your ice cream is between 5°F and 10°F (-15°C to -12°C). If it is too cold, it won’t blend; if it is too warm, you lose the “upright spoon” density.
- Sieve the Cocoa: Always sift your cocoa powder before adding it to the blender to avoid clumps that break the “velvety” visual aesthetic.
- Avoid Over-Blending: Over-blending introduces friction and heat, which will turn your matte masterpiece into a glossy, runny liquid. Stop as soon as the large chunks are gone.
- Glassware Matters: A thick-walled glass holds the temperature longer, maintaining the frost and the shake’s structure for your smartphone photo session.
Creative Pairings: What to Serve With This Shake
This ultra-thick chocolate shake is a rich, decadent experience. To balance the palate, consider serving it alongside something bright or savory. For a complete weekend menu, you might start with chicken zucchini stir fry or a light greek salad recipe to offset the indulgence.
If you are hosting a themed dinner, these chocolate milkshake recipes pair surprisingly well with the smoky notes of buldak or the tropical sweetness of a coconut chicken rice bowl. The bitterness of the 70% dark chocolate acts as a bridge between sweet and savory courses.
Frequently Asked Questions
Yes, a food processor is actually excellent for thick shakes because the wide blades can handle dense frozen ingredients without the need for added liquid milk.
Rinse your glass with cold water before placing it in the freezer. The moisture freezes into a thin layer of ice, creating a long-lasting frost effect once the cold shake is added.
When paired with a sweet vanilla bean ice cream base, the bitterness of 70% chocolate provides a sophisticated balance. The addition of a pinch of sea salt also helps to mellow the bitterness.
Also known as Dutch-processed, alkalized cocoa has a neutralized acidity, resulting in a darker color and a smoother, more ‘matte’ flavor and appearance compared to natural cocoa powder.
Most chocolate milkshake recipes use too much milk. For a truly thick texture, use a ‘dry-blend’ method with high-fat ice cream and minimal to no liquid, using a blender tamper to process the frozen base.
The Ultimate Thick Chocolate Milkshake Recipe Card
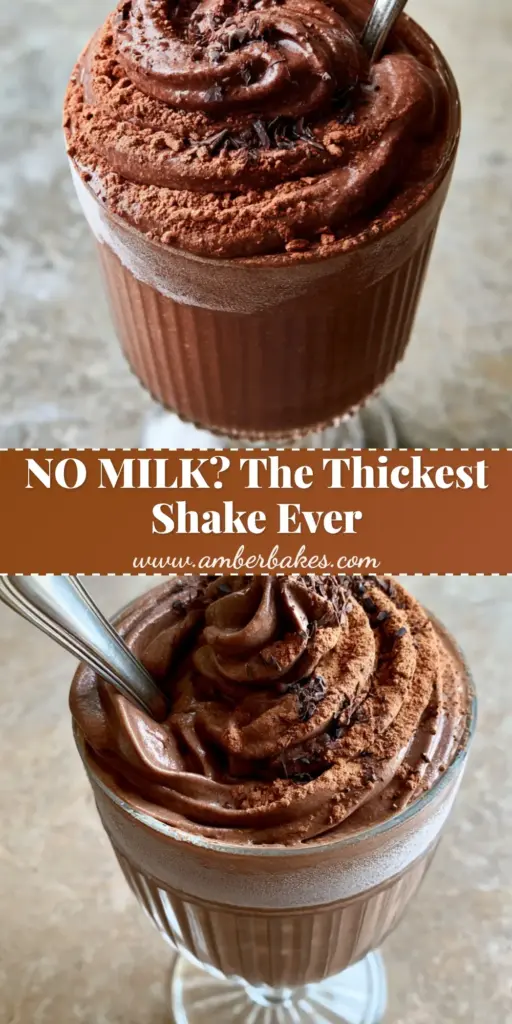
Chocolate Milkshake Recipes: The Ultra-Thick Dark Chocolate Velvet Shake
Ingredients
Equipment
Method
- Place the vintage ribbed glass in the freezer for at least 30 minutes to achieve a frost-covered look.
- Combine ice cream and salt in a blender. Pulse using a tamper until smooth but extremely thick; do not let it become liquid.
- Add 2 tbsp of cocoa powder and pulse 2-3 times to create deep, sculpted dark ripples.
- Spoon the thick mixture into the frosted glass, dust with the remaining cocoa, scatter chocolate shavings, and insert a spoon upright.
Notes
Ensure the spoon is heavy stainless steel to truly demonstrate the shake's structural integrity.
Closing & Call to Action
Mastering the art of chocolate milkshake recipes requires a shift from “liquified drinks” to “sculpted desserts.” By focusing on a dry-blend technique and high-quality dark chocolate components, you can create a shake that is as visually stunning as it is delicious. We invite you to share your thick shake creations with us! If you enjoyed this professional culinary deep-dive, please leave a comment below and follow us on Pinterest for more visually-aligned recipe inspiration.