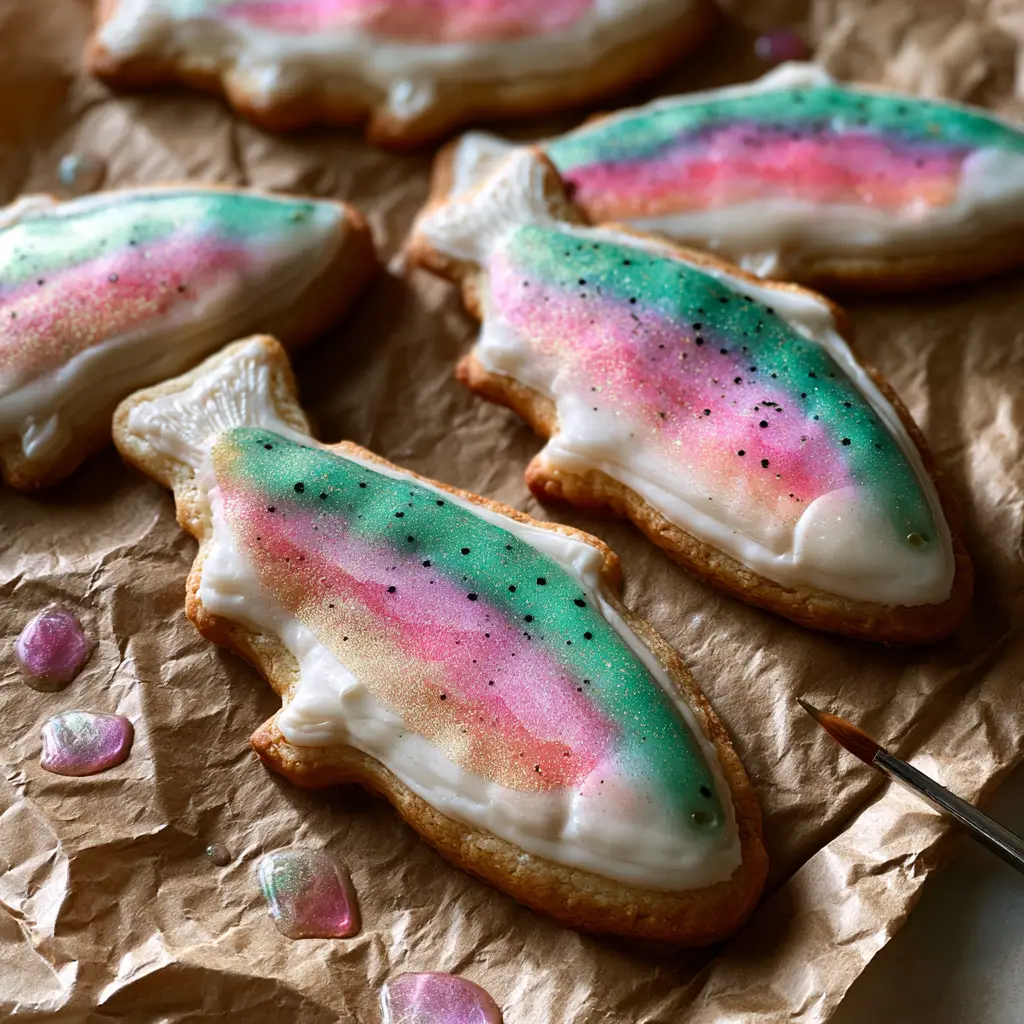
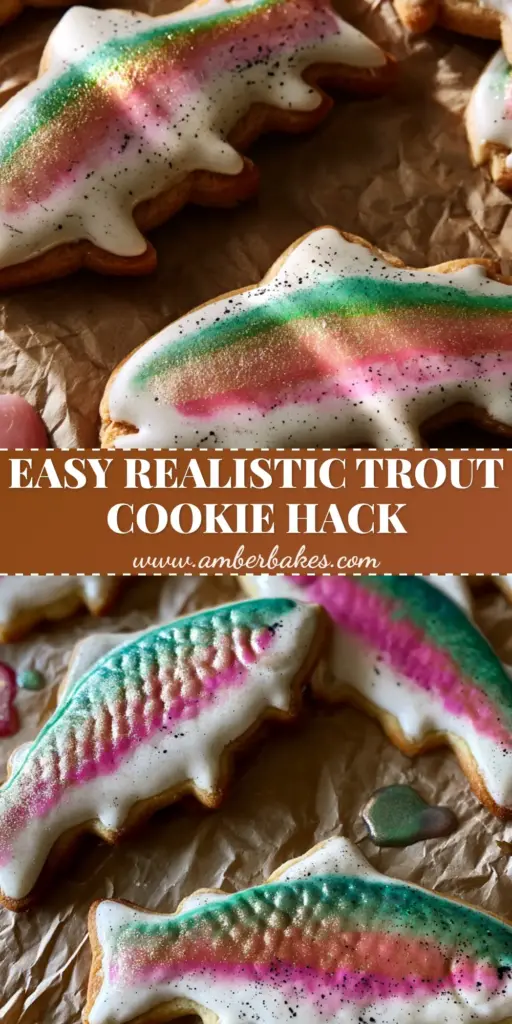
When the worlds of fine art and professional baking collide, you get the breathtakingly realistic Rainbow Trout Cookies. These aren’t just your standard holiday treats; they are a culinary canvas designed to mimic the iridescent scales and vibrant life of a wild trout. Featuring a crisp, golden-brown vanilla sugar cookie base and a shimmering watercolor finish, these cookies are a showstopper for fishing enthusiasts and dessert lovers alike.
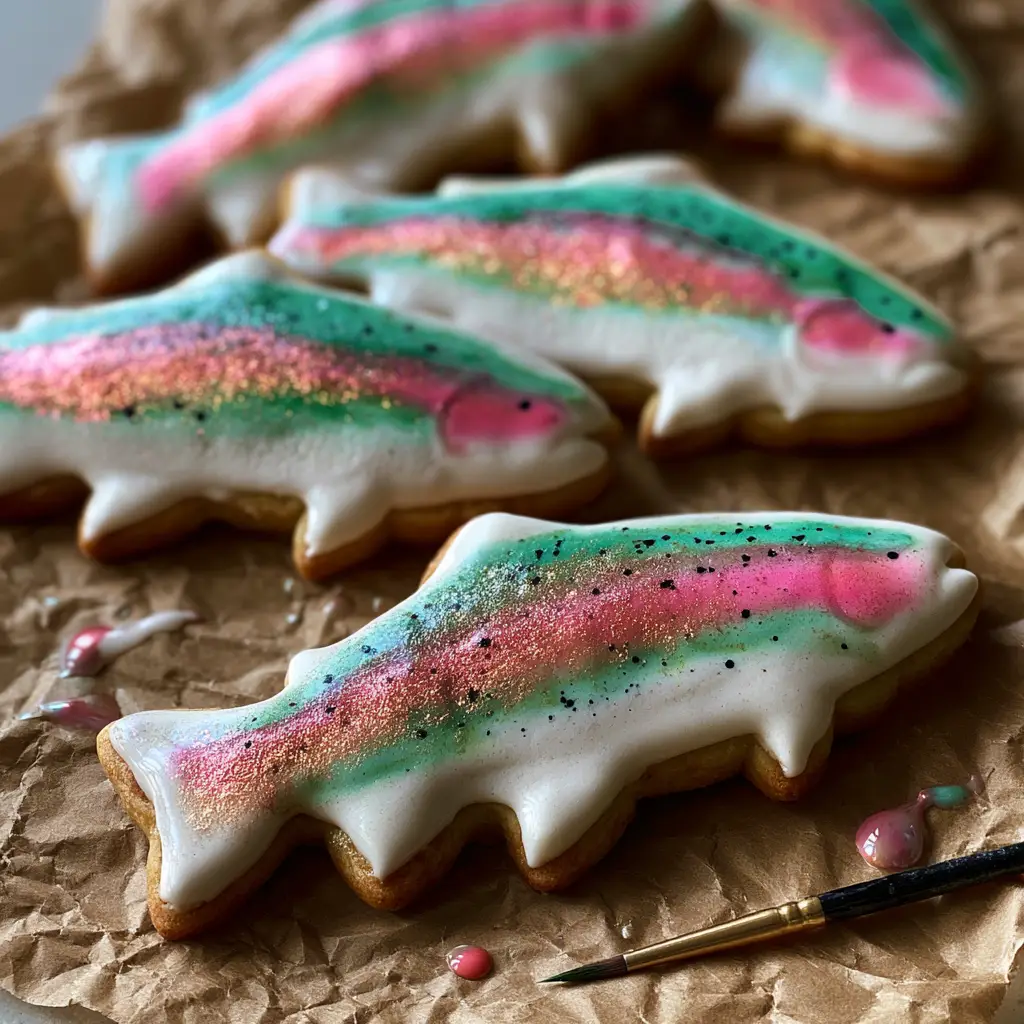
The beauty of these Rainbow Trout Cookies lies in the details—the slight shimmer of silver luster dust, the vibrant emerald green and rose pink streaks, and the tiny black specks that make each “fish” look like it was just pulled from a crystal-clear mountain stream. In this guide, we will break down the forensic culinary science required to achieve this specific visual result, from the “no-spread” cookie dough to the delicate hand-painting techniques.
Whether you are preparing a special gift for an angler or looking for a centerpiece for a nature-themed event, these cookies offer a sophisticated aesthetic that stands out on any dessert table. Let’s dive into the techniques that transform simple pantry staples into edible masterpieces.
Why You’ll Love This Realistic Rainbow Trout Cookie Recipe
- Visual Masterpiece: Each cookie features a professional-grade watercolor effect that mimics the natural beauty of rainbow trout scales.
- Perfect Texture: We use a high-stability vanilla sugar cookie base that maintains its sharp trout-shaped edges without spreading in the oven.
- Shimmering Finish: The inclusion of silver iridescent luster dust provides a realistic “wet” look that catches the light beautifully, just like real fish scales.
- Skill Building: You will learn the foundational “watercolor on royal icing” technique, a versatile skill for any advanced cookie decorator.
The Anatomy of a Perfect Trout: Ingredients and Substitutions
To achieve the specific visual blueprint of our Rainbow Trout Cookies, we must select ingredients that provide both structural integrity and a smooth, white surface for painting. Every component serves a specific forensic purpose in the final aesthetic.
The “No-Spread” Cookie Base
Unsalted Butter (Room Temp): 1 cup (227g). High-quality butter provides the fat necessary for a tender crumb while its solid state at room temp helps the cookie hold its shape.
Granulated Sugar: 1 cup (200g). Sugar does more than sweeten; it aerates the butter during creaming, creating a structure that resists collapsing.
Large Egg: 1 (50g). The protein in the egg acts as the “glue,” binding the flour and fats together to ensure the trout shape doesn’t crumble.
Vanilla Bean Paste or Extract: 1 tsp (5ml). While extract works, vanilla bean paste adds tiny black flecks to the dough, echoing the speckles we will later paint on the surface.
All-Purpose Flour: 3 cups (375g). This provides the gluten structure. Ensure you measure by weight to avoid a dry, sandy cookie.
Baking Powder: 1/2 tsp (2g). Just a touch is used to give the cookie a slight lift without causing it to lose its defined trout silhouette.
Fine Sea Salt: 1/2 tsp (3g). Salt balances the sugar and enhances the subtle vanilla notes of the base.
The Royal Icing Canvas
Powdered Sugar: 4 cups (500g). Sifted sugar is the foundation of a “smooth white royal icing” finish.
Meringue Powder: 3 tbsp (30g). This provides a safe, shelf-stable way to achieve a hard, matte finish that is perfect for watercolor painting.
Warm Water: 5-7 tbsp (75-105ml). The water is added gradually to reach “flood consistency,” which allows the icing to self-level into a flat surface.
The Artistic Finishing Touches
Rose Pink & Emerald Green Gel Food Coloring: These high-pigment colors are diluted to create the “watercolor paint” mentioned in the visual prompt.
Silver Iridescent Luster Dust: This is dry-brushed or mixed with spirits to create the “shimmering watercolor effect.”
Clear Alcohol (Vodka or Lemon Extract): 1 tbsp (15ml). Because alcohol evaporates quickly, it allows us to paint on the icing without dissolving the sugar.
Black Edible Ink: Used for the “tiny black edible ink specks” that define the rainbow trout’s unique markings.
Essential Equipment for Cookie Forensics
To replicate the Midjourney prompt’s specific look, you’ll need more than just a standard baking sheet. Precision is key when dealing with realistic food art.
Trout-Shaped Cookie Cutter: A sharp metal cutter ensures clean edges that turn golden brown and crisp during baking.
Fine-Tip Paintbrushes: You will need one for the broad color streaks and a “small fine-tip paintbrush” for the delicate speckling and luster dust application.
Crinkled Brown Parchment Paper: Essential for both the baking process and the final presentation to match our visual blueprint.
Scribe Tool or Toothpick: Used to pop any tiny air bubbles in the royal icing to ensure a perfectly smooth base.
A Step-by-Step Guide to Baking Rainbow Trout Cookies
1. Mastering the Vanilla Sugar Cookie Base
Start by creaming your 1 cup (227g) of butter and 1 cup (200g) of sugar until just combined. Do not over-beat; introducing too much air will cause the cookies to puff and lose the trout shape. Add the egg and vanilla bean paste, mixing until the yellow of the egg is fully incorporated.
Whisk together your 3 cups (375g) of flour, baking powder, and salt. Slowly add the dry ingredients to the wet. The dough should be soft but not sticky. Wrap the dough and chill for at least 1 hour. Chilling is the “invisible step” that prevents spreading.
2. Cutting and Achieving the “Golden Brown Edge”
Roll the dough to a consistent 1/4 inch (6mm) thickness on a lightly floured surface. Use your trout cutter to stamp out the shapes. Place them on your crinkled brown parchment paper-lined trays.
Bake at 350°F (175°C) for 10-12 minutes. You are looking for a specific visual cue: the edges of the cookies should be golden brown and crisp, while the centers remain pale. This provides the structural contrast mentioned in the visual prompt.
3. Flooding the Smooth White Royal Icing
Whisk the powdered sugar, meringue powder, and water until you reach a 15-second consistency (when a drizzled line of icing disappears back into the bowl in 15 seconds). This ensures the icing is thick enough to stay on the cookie but thin enough to self-level.
Outline the trout and then immediately “flood” the center. Use a scribe tool to move the icing into the tail and fins. Let these dry for a full 12-24 hours. The icing must be completely hard before you can apply the watercolor effect.
4. Painting the Rainbow Trout Watercolor Effect
Mix a tiny drop of emerald green gel coloring with a few drops of vodka on a palette. Do the same for the rose pink. Using a damp brush, paint a “vibrant horizontal streak” of rose pink along the midline of the fish. While it’s still slightly wet, add a streak of emerald green just above it, letting them bleed slightly for a natural look.
Once the color is dry to the touch, dip your small fine-tip paintbrush into the black edible ink (or concentrated black food coloring). Tap the brush over the cookie to create “tiny hand-painted black speckles.” This mimics the forensic detail of a real trout’s skin.
5. The Final Shimmer: Iridescent Luster Dust
The “shimmering watercolor effect” is achieved by dry-brushing silver iridescent luster dust over the entire surface of the dried paint. Focus the dust on the center of the fish to catch the “soft side-lighting.” This adds depth and a realistic scales-like texture.
Pro-Tips for Artisanal Cookie Success
- Control Moisture: When painting, never use water. Use high-proof vodka or lemon extract. Water will dissolve the royal icing, while alcohol evaporates before damage occurs.
- The Crinkled Paper Trick: For the photo-ready look seen in our prompt, crinkle your parchment paper into a ball, then flatten it out before placing the cookies. This adds textural depth to your presentation.
- Side-Lighting: To photograph your Rainbow Trout Cookies like a pro, place your tray near a window. The side-lighting will highlight the luster dust texture and the crisp edges of the cookies.
- Fixing “Craters”: If your icing develops small holes in the fins, your icing was likely too thin. Aim for a slightly thicker “20-second” consistency for the smaller areas of the trout shape.
Storage and Shelf-Life
Because these cookies are fully dried and sealed with royal icing, they have an impressive shelf life. Store them in an airtight container at room temperature for up to 2 weeks. Do not refrigerate, as the humidity can cause the “watercolor” paint to run and the luster dust to lose its shimmer.
If you wish to freeze them, do so before painting. Thaw the iced cookies completely in the airtight container before opening to prevent condensation from forming on the “smooth white royal icing.”
What to Serve with Your Artistic Creations
These Rainbow Trout Cookies are a fantastic conclusion to a nature-inspired meal. If you’re hosting a dinner party, consider starting with a savory seafood dish like classic rainbow trout almondine or a light traditional Greek salad.
For a themed dessert spread, pair these with blackberry jam-filled tarts or a refreshing homemade lemonade. If you want to lean into the whimsical side, serve them alongside fun watermelon fries for a summer lake-day vibe.
Frequently Asked Questions
It is not recommended. Water dissolves the sugar in the royal icing, which can cause pitting and ruin the smooth surface. High-proof alcohol or lemon extract evaporates quickly, leaving only the pigment behind.
The white royal icing needs 12-24 hours to harden completely before you can paint on it. Once painted, the watercolor details dry within 30 minutes due to the alcohol content.
Yes, as long as you use luster dust labeled as ‘FDA-approved’ and ‘Edible.’ Avoid dusts labeled ‘Non-Toxic’ as they are meant for decorative elements that are removed before eating.
Trout-shaped cutters are available at specialty baking stores or through online retailers. If you can’t find one, you can hand-cut the shapes using a paper template and a sharp knife.
Spreading usually happens because the dough was too warm or the butter was over-creamed. Ensure you chill the dough for at least an hour before cutting and avoid incorporating too much air when mixing the butter and sugar.
The Ultimate Rainbow Trout Cookies Recipe
Rainbow Trout Cookies: How to Create Realistic Watercolor Sugar Cookie Art
Ingredients
Equipment
Method
- Cream the butter and sugar until smooth. Add egg and vanilla bean paste, mixing until fully incorporated.
- Mix in dry ingredients. Wrap dough and chill for 1 hour to prevent spreading.
- Cut trout shapes and bake at 350°F (175°C) for 10 minutes until edges are golden brown.
- Flood with white royal icing and let dry for 24 hours until hard.
- Paint horizontal streaks of rose pink and emerald green using diluted gel colors.
- Add black edible ink speckles and brush with silver luster dust for a shimmering finish.
Notes
Allow the icing to dry completely (24 hours) before attempting the watercolor technique.
Creating these Rainbow Trout Cookies is a rewarding journey into the world of edible art. By following the forensic details of the watercolor technique and ensuring your vanilla sugar cookie base is structurally sound, you can produce a dessert that looks like it belongs in a high-end gallery.
If you enjoyed this tutorial, I would love to see your creations! Share your photos on Instagram and tag me, or save this recipe to your “Baking Art” board on Pinterest. For more unique dessert inspiration, don’t forget to check out my other celebration recipes and seasonal treats.