Salmon stuffed shells are the ultimate comfort food for seafood lovers, combining succulent, pan-seared Atlantic salmon with a luxurious garlic butter cream sauce. If you are looking for a show-stopping dinner that feels like a five-star restaurant meal but comes together in your own kitchen, this recipe is for you. The combination of tender pasta, flaky pink fish, and bubbling mozzarella cheese creates a visual and culinary masterpiece that is impossible to resist.
Whether you are hosting a dinner party or simply craving a decadent weeknight meal, these stuffed shells deliver on every front. The vibrant green of wilted baby spinach tucked alongside moist salmon flakes makes every bite a balanced experience. This dish is specifically designed to be highly “pinnable” and “saveable,” thanks to its incredible vertical height and golden, bubbly cheese topping.
Why You Will Crave These Salmon Stuffed Pasta Shells
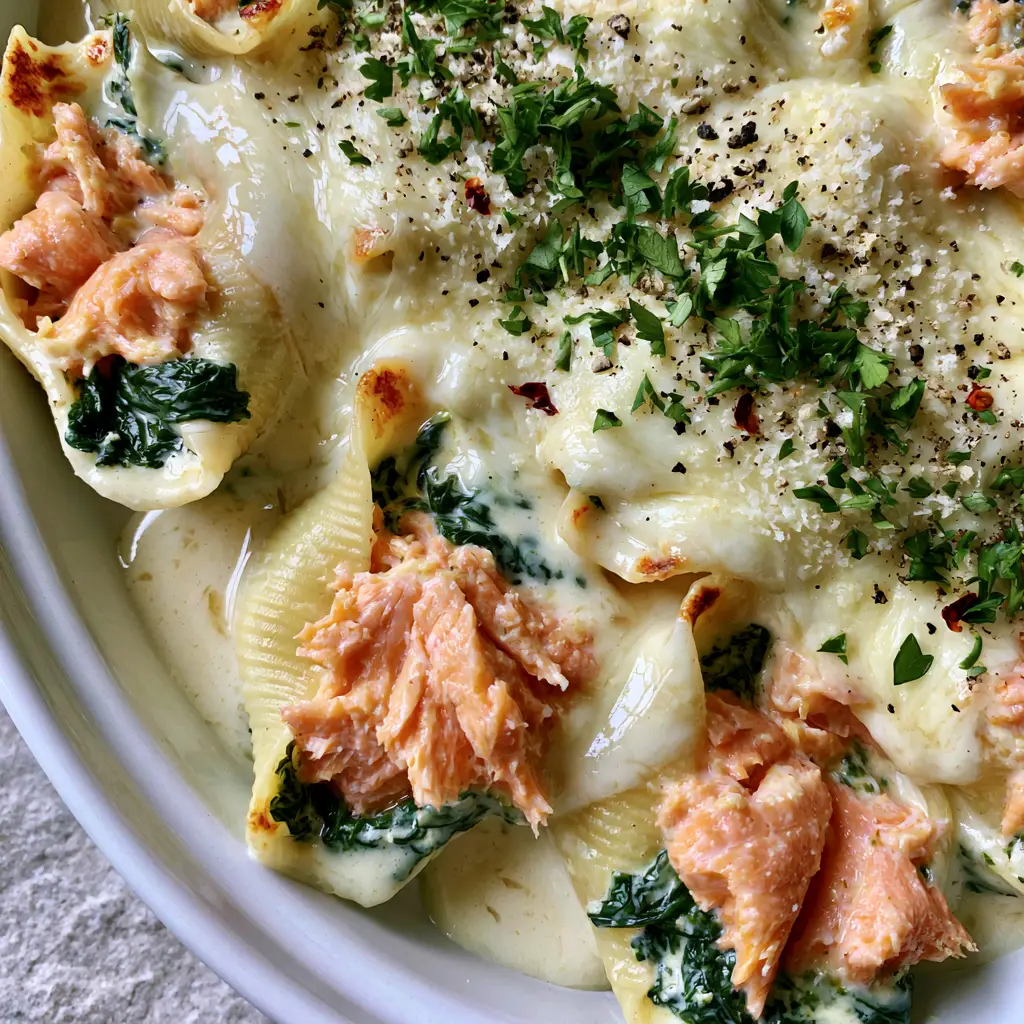
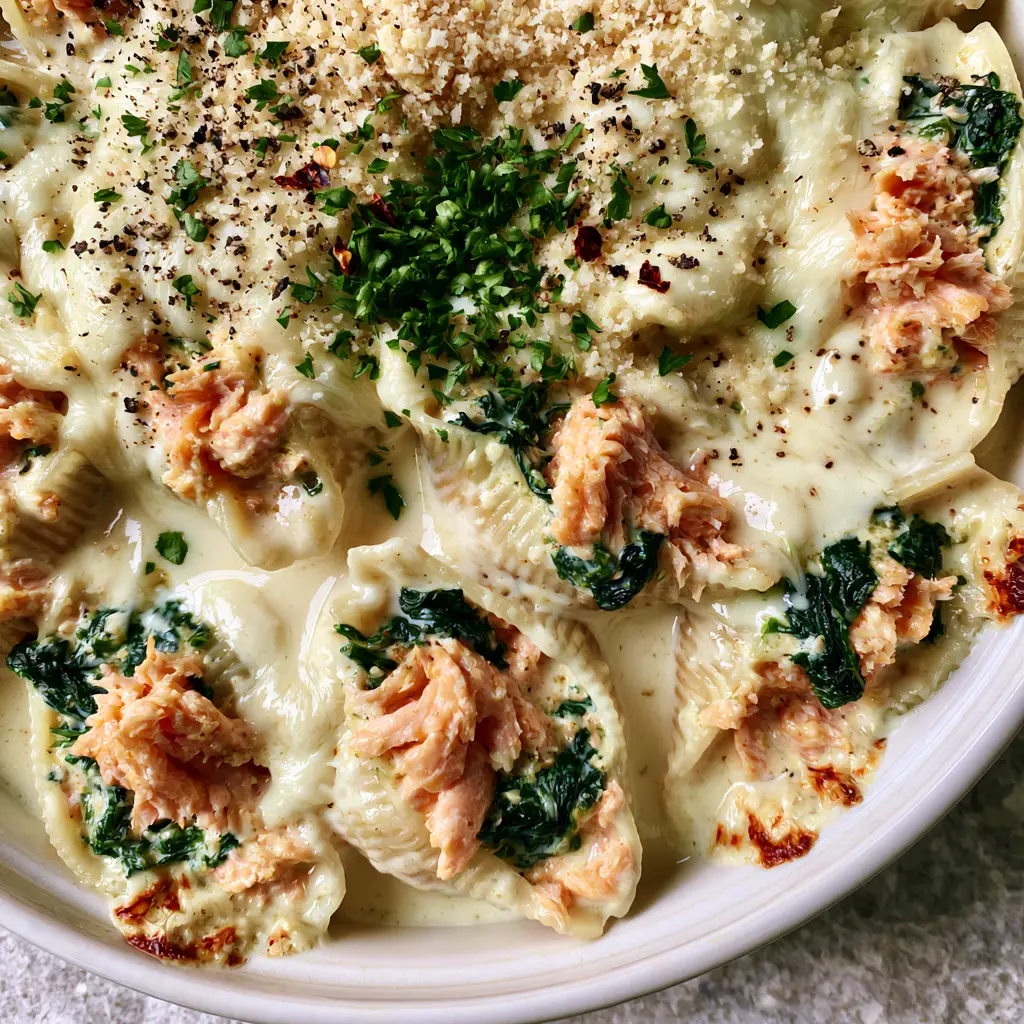
- Visual Masterpiece: The contrast between the bright pink salmon, deep green spinach, and the pale ivory cream sauce is stunning.
- Textural Harmony: You get the crunch of toasted pasta edges, the creaminess of melted mozzarella, and the delicate flake of perfectly seared salmon.
- Crowd Pleaser: It’s a sophisticated upgrade to traditional ricotta-filled shells, making it perfect for seafood pasta enthusiasts.
- Gourmet Sauce: A heavy-bottomed garlic butter cream sauce binds everything together with a silky finish.
The Ultimate Grocery List for Salmon Stuffed Shells
To achieve the specific look and taste of this dish, high-quality ingredients are paramount. Here is what you need to gather:
Jumbo Pasta Shells: You will need 12 oz (340g) of jumbo shells. These act as the “vessels” for our rich filling. Cook them just to al dente so they hold their shape in the white ceramic baking dish.
Fresh Atlantic Salmon: 1.5 lbs (680g) of fresh fillet. We pan-sear this to get those large, moist flakes that look so appetizing in the final photo. Using a good salmon seasoning blend before searing adds a deep base layer of flavor.
Baby Spinach: 5 oz (142g) of fresh baby spinach. When wilted, it provides a vibrant color contrast and a necessary earthy note to cut through the richness of the cream.
Garlic Butter Cream Sauce: This is made from 4 tbsp (56g) unsalted butter, 4 cloves of minced garlic, and 2 cups (480ml) of heavy cream. It should be thick, glossy, and pale ivory.
The Cheese Blend: 2 cups (225g) of shredded mozzarella for that bubbly, melted topping and 1/2 cup (50g) of freshly grated parmesan for a salty, nutty bite.
Garnish & Aromatics: Freshly chopped parsley, cracked black pepper, and dried red pepper flakes for that final pop of color and heat.
Mastering the Prep: A Step-by-Step Guide
Step 1: Preparing the Jumbo Shells
Bring a large pot of salted water to a boil. Cook the jumbo shells for about 1-2 minutes less than the package directions. You want them firm to the touch because they will continue to soften as they bake in the cream sauce. Drain and rinse with cool water to stop the cooking process and prevent sticking.
Step 2: Pan-Searing the Perfect Salmon
Season your salmon fillets generously. In a large skillet over medium-high heat, add 1 tbsp (15ml) of olive oil. Sear the salmon for 4-5 minutes per side until the exterior is golden-brown. Once cooked, use a fork to break the salmon into large, moist pink chunks. Avoid over-shredding; we want visible pieces of fish for the best visual appeal.
Step 3: Wilting the Spinach and Making the Sauce
In the same skillet, add a touch more oil if needed and toss in the baby spinach. Sauté for 1-2 minutes until just wilted but still vibrant dark green. Remove the spinach and set it aside with the salmon.
Wipe the skillet and melt the butter over medium heat. Stir in the minced garlic until fragrant (about 30 seconds). Pour in the heavy cream and whisk constantly. Let it simmer gently until it thickens into a glossy, pale ivory sauce that coats the back of a spoon. Season with salt and cracked black pepper to taste.
Step 4: Stuffing the Shells with Precision
This is where the magic happens. Take a cooked shell and nestle a large chunk of salmon and a small bundle of wilted spinach inside. Repeat until all shells are stuffed to the brim. Arrange them tightly in a white ceramic baking dish.
Pour the garlic butter cream sauce generously over the shells, ensuring you leave visible pools of sauce in the crevices between the pasta. This creates that handheld smartphone photo look that Pinterest users love.
Step 5: The Final Bake for Golden Perfection
Top the dish with a heavy layer of mozzarella and a dusting of parmesan. Bake at 375°F (190°C) for 15-20 minutes. For the signature look, turn on the broiler for the last 2 minutes to create golden-brown toasted spots on the edges of the shells and bubbly brown spots on the cheese.
Expert Tips for Success
- Don’t Overcook the Salmon: Keep the flakes large and moist. If you overcook the fish during the sear, it will become dry after the second bake in the oven.
- Use Fresh Parmesan: Pre-shredded cheese is coated in potato starch, which prevents it from melting into that smooth, glossy finish we want.
- Sauce Consistency: If your sauce gets too thick, whisk in 1-2 tbsp (15-30ml) of pasta water to loosen it up before pouring.
- Color Contrast: Don’t skip the red pepper flakes! That tiny hint of red against the white sauce and green spinach makes the photo pop.
How to Store and Reheat Your Stuffed Shells
If you have leftovers of these salmon stuffed shells, they can be stored in an airtight container in the refrigerator for up to 2 days. Because salmon is delicate, we don’t recommend keeping it much longer.
To reheat, place the shells in an oven-safe dish, add a splash of milk or cream to the bottom to keep the sauce from breaking, and cover with foil. Heat at 325°F (165°C) until warmed through. This prevents the salmon from becoming rubbery, which can happen in a microwave.
What to Pair with Seafood Pasta
This is a rich, decadent dish, so it pairs best with light, acidic sides. A crisp arugula salad with a lemon vinaigrette or roasted asparagus works beautifully. If you love a themed seafood night, consider starting with a lighter appetizer or serving this alongside crusty sourdough bread to soak up every drop of that garlic cream sauce.
Frequently Asked Questions
You can assemble the shells and sauce up to 4 hours in advance. Keep the dish covered in the fridge and add an extra 5-10 minutes to the bake time if starting from cold.
Yes, you can use canned salmon for a quicker version. However, for the best visual appeal and flavor, we recommend fresh pan-seared Atlantic salmon to get those large, moist flakes.
Ensure you use heavy cream rather than milk or half-and-half. The higher fat content in heavy cream stabilizes the sauce and prevents it from separating during the baking process.
Reheat in the oven at 325°F (165°C) covered with foil. Add a small splash of cream or water to the dish before heating to restore the glossy texture of the sauce without drying out the salmon.
The Official Salmon Stuffed Shells Recipe
Salmon Stuffed Shells with Garlic Butter Cream Sauce
Ingredients
Equipment
Method
- Cook jumbo shells in salted water until just al dente. Drain and set aside.
- Season salmon and sear in a skillet until golden-brown and flaky. Break into large chunks.
- Melt butter, sauté garlic, and whisk in heavy cream until thickened and glossy.
- Fill each shell with salmon and spinach; place in a ceramic dish and pour sauce over the top.
- Top with mozzarella and parmesan. Bake at 375°F (190°C) until cheese is bubbly and edges are toasted.
Notes
Broil for the final 2 minutes to get those perfect golden-brown toasted spots on the pasta.
Save This Recipe for Later!
Did you love these salmon stuffed shells? If so, please head over to Pinterest and save this recipe to your “Dinner Ideas” or “Seafood Recipes” board! Following amber_bakes ensures you never miss a new gourmet creation. If you make this dish, please snap a photo and share it in the comments below—I love seeing your white ceramic baking dishes filled with bubbly cheese! Don’t forget to leave a 5-star rating to help other home cooks find this recipe.