When the mercury rises and the air turns thick with summer heat, nothing refreshes the palate quite like a vibrant watermelon salad. This dish is more than just a seasonal side; it is a masterclass in the balance of contrasting flavors and textures. Imagine the crunch of icy-cold fruit meeting the creamy tang of salt-cured cheese, all unified by a citrus-bright glaze that shimmers under the sun.
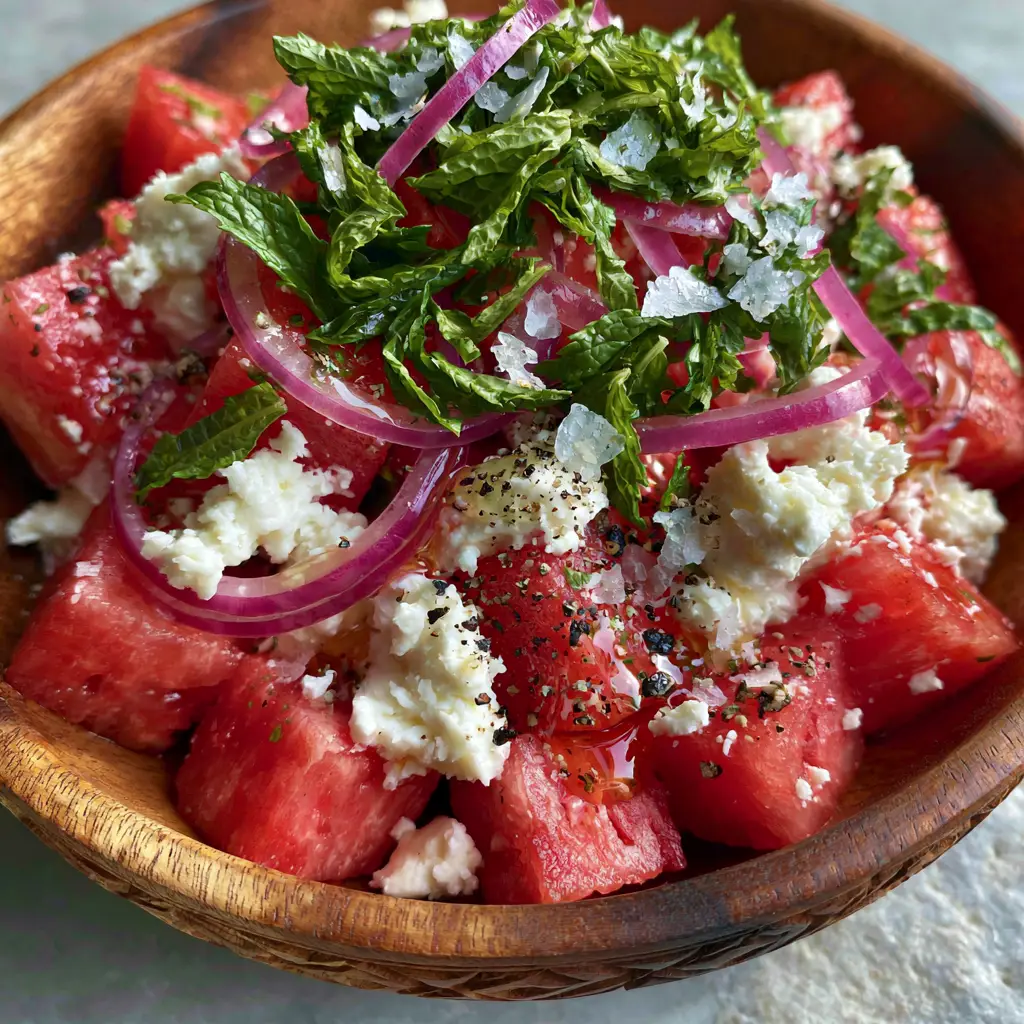
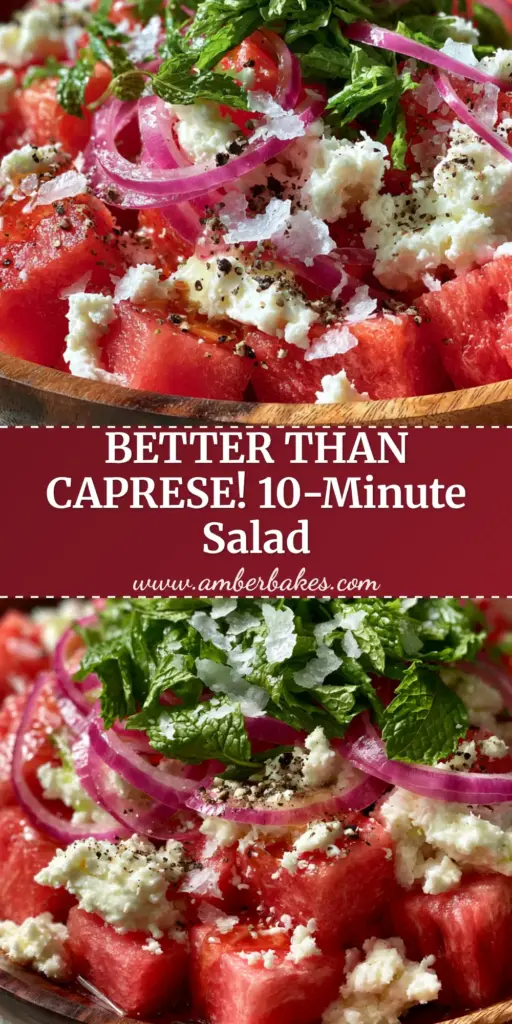
The beauty of this watermelon salad lies in its visual architecture. From the deep-red uniform cubes of fruit to the translucent purple rings of red onion, every element is designed to pop against a rustic background. Whether you are hosting a backyard barbecue or looking for a sophisticated appetizer, this recipe delivers a high-impact aesthetic with minimal effort.
To achieve the professional look seen in our visual guides, we focus on precision cutting and temperature control. Cooling the fruit to a specific “matte” finish allows the honey-lime drizzle to cling to the surface rather than sliding off. Let’s dive into the culinary science that makes this the ultimate summer staple.
The Aesthetic Allure of the Perfect Summer Bowl
A truly exceptional watermelon salad is defined by its sensory contrasts. We aren’t just tossing ingredients in a bowl; we are building a structural experience that satisfies the eyes before the first bite. The following elements are what elevate this recipe into a gourmet centerpiece:
- Structural Uniformity: Using 1-inch (2.5cm) cubes creates a clean, architectural base that allows other ingredients to nestle into the crevices.
- Chilled Matte Texture: By chilling the watermelon post-cut, we remove excess moisture from the surface, creating a velvet-like texture that captures the light.
- Translucent Onion Rings: An ice-water bath removes the harsh “bite” of red onions, leaving behind beautiful, purple-hued glass-like ribbons.
- The Glossy Shimmer: A precise ratio of honey and lime juice creates a reflective glaze that highlights the emerald-green mint chiffonade.
- Textural Contrast: The crunch of flakey sea salt and the coarse grit of cracked black pepper provide a savory finish to the sweetness of the melon.
Components for a Visually Stunning Watermelon Salad
To recreate this masterpiece, every ingredient must be selected with both flavor and physics in mind. While the list is short, the quality of each component dictates the final outcome of your watermelon salad.
Seedless Deep-Red Watermelon: Look for a melon that feels heavy for its size with a buttery yellow field spot. This ensures the 6 cups (900g) of cubes you cut are dense, sweet, and structurally sound enough to hold their shape.
Creamy Snowy-White Feta: Opt for high-quality sheep’s milk feta stored in brine for the best “crumbled” texture. You will need 1 cup (150g) to provide that necessary salt-forward creaminess that cuts through the fruit’s sugar.
Fresh Mint Leaves: Emerald-green mint is essential for the “chiffonade” garnish. About 1/2 cup (15g) of tightly packed leaves will provide the refreshing aromatic finish that defines the dish.
Purple Red Onion: One small onion (about 50g) sliced into paper-thin rings adds a sharp visual contrast and a subtle savory depth. Soaking these in cold water is a non-negotiable step for achieving the translucent look.
Fresh Lime Juice & Raw Honey: 2 tbsp (30ml) of lime juice and 1 tbsp (21g) of honey form the “glossy shimmer.” This emulsion acts as a culinary lacquer, enhancing the colors of the salad.
Flakey Sea Salt & Cracked Black Pepper: These are the “foundational invisible” ingredients. 1 tsp (5g) of flakey salt (like Maldon) and 1/2 tsp (1g) of coarse pepper provide the final hit of savory seasoning.
Essential Tools for Precision Preparation
Achieving the macro-level detail seen in our professional photography requires a few specific kitchen tools. You cannot achieve “uniform cubes” or “translucent rings” with dull or improper equipment.
A sharp 8-inch Chef’s Knife is your primary tool for cubing the melon and achieving the mint chiffonade. For the red onions, a Mandoline Slicer set to its thinnest setting (1mm) is recommended to get those purple rings truly translucent.
You will also need a rustic, shallow hand-carved acacia wood bowl to replicate the plating style. The dark wood provides a natural contrast to the vibrant reds and greens of the watermelon salad, making the colors appear even more saturated.
Mastering the Prep: Step-by-Step Instructions
Phase 1: Taming the Red Onion
Begin by peeling your red onion and slicing it into ultra-thin rings using your mandoline or a very sharp knife. Immediately submerge these rings into a bowl of ice-cold water for at least 10 minutes.
This process, often used in traditional onion salads, leaches out the sulfurous compounds that cause a lingering aftertaste. More importantly, it firms up the cell walls, making the rings crisp and beautifully translucent for your watermelon salad.
Phase 2: Carving the Foundation
Slice the top and bottom off your seedless watermelon so it stands flat on your cutting board. Carefully remove the rind, ensuring you take off all the white pith to reveal the deep-red interior.
Cut the fruit into uniform 1-inch (2.5cm) cubes. Once cut, place the cubes on a parchment-lined tray and refrigerate for 20 minutes. This creates that specific matte texture and ensures the fruit is icy-cold when served.
Phase 3: The Mint Chiffonade and Glaze
Stack your fresh mint leaves, roll them tightly like a cigar, and slice across the roll into thin, thread-like ribbons. This “chiffonade” technique prevents the mint from bruising, keeping it bright emerald-green.
In a small glass jar, whisk together the lime juice and honey until fully emulsified. You are looking for a thick, syrupy consistency that is clear and reflective. This is the secret to the “glossy shimmer” described in our visual blueprint.
Phase 4: Final Assembly and Plating
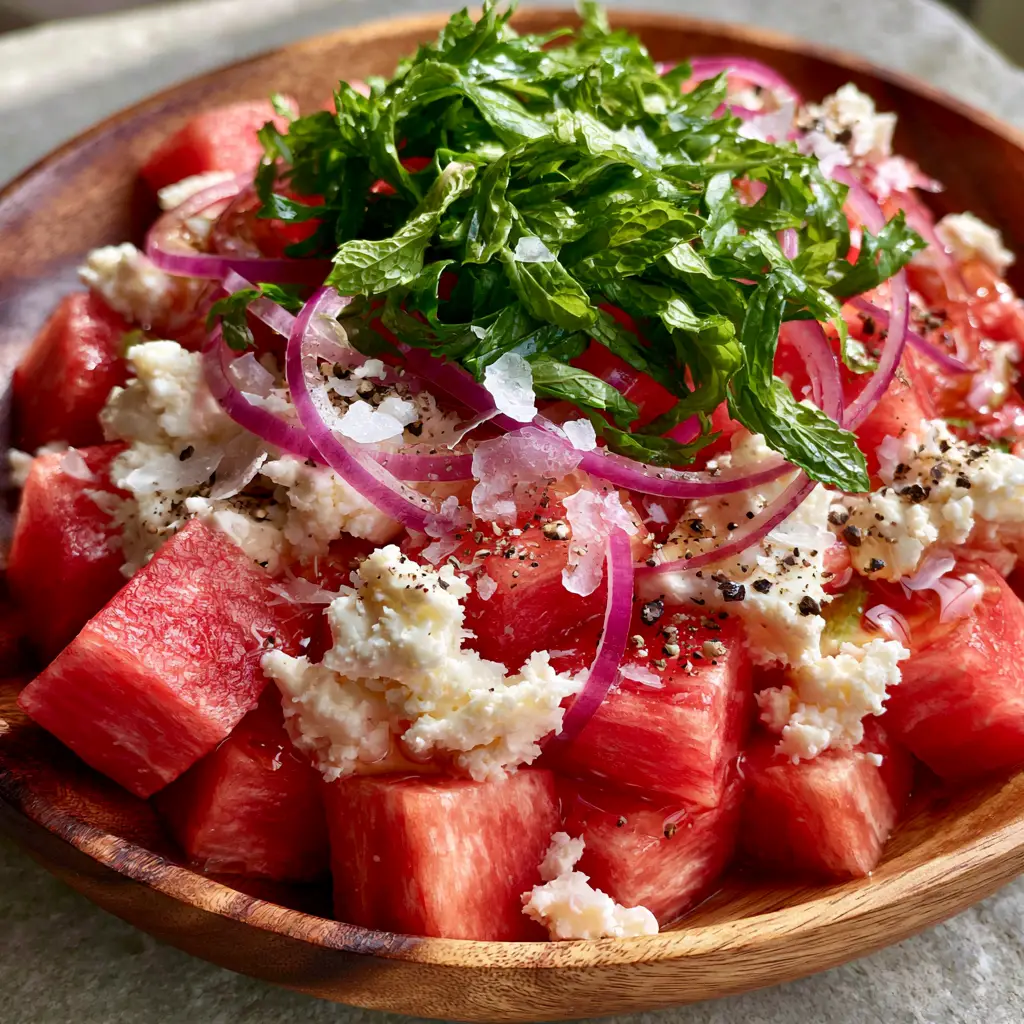
Arrange the chilled watermelon cubes in your acacia wood bowl in a single, slightly overlapping layer. Scatter the drained and patted-dry onion rings over the top, followed by generous, irregular crumbles of feta cheese.
Drizzle the lime-honey glaze evenly over the bowl, watching as it catches the light on the matte fruit. Finish with a dense dusting of the mint ribbons, flakey sea salt, and a coarse grind of black pepper.
Pro-Tips for a High-End Finish
- The Temperature Rule: Never assemble the watermelon salad until the very moment of serving. Watermelon begins to weep juice once it touches salt, which will dilute your glossy glaze.
- Feta Selection: Avoid pre-crumbled feta, which is often coated in cellulose to prevent clumping. Crumbing a block by hand creates those “generous, irregular” pieces that look best in photos.
- Pepper Power: Use a coarse grind for the black pepper. The larger fragments provide a better visual contrast against the white feta than fine powder does.
- Glaze Emulsion: If your honey is too thick, microwave it for 5 seconds before mixing with lime juice to ensure a smooth, pourable shimmer.
The Best Pairings for Your Summer Spread
This watermelon salad is a versatile player that shines alongside other seasonal favorites. Because of its sweet-and-savory profile, it pairs excellently with Mediterranean-style grilled meats or hearty pasta dishes.
If you are planning a full garden party, consider serving this alongside a classic Greek pasta salad or a citrus-heavy chickpea cucumber feta salad. For those who love the 4th of July aesthetic, this red-and-white dish is a staple of patriotic holiday food lineups.
Leftover watermelon from your cubing process? Don’t let it go to waste. You can explore various watermelon recipes like gazpacho or even try your hand at watermelon rind jellies for a zero-waste kitchen approach.
Storage and Longevity
Due to the high water content of the fruit, this salad is best enjoyed within 2 hours of assembly. If you must store it, keep the watermelon cubes and the glaze in separate containers in the refrigerator.
Once the salt and lime juice are applied, the watermelon will begin to release its juices, turning the “matte” cubes into a softer texture. We do not recommend freezing this salad, as the feta and watermelon will both lose their structural integrity upon thawing.
Frequently Asked Questions About Watermelon Salad
You can prep the ingredients separately (cube the melon, slice the onions, whisk the glaze) up to 24 hours in advance. However, do not assemble or salt the salad until immediately before serving, as the salt will cause the watermelon to release its juices and lose its crisp texture.
Yes, goat cheese (chèvre) is a great alternative. It provides a similar tang, though it is softer and will create a creamier ‘smear’ rather than distinct crumbles.
Soak the thinly sliced onion rings in ice-cold water for at least 10-15 minutes. This leaches out the harsh sulfur compounds, making them milder and crisper.
A block of Greek sheep’s milk feta stored in brine is best. It has a higher fat content and creamier texture than pre-crumbled varieties, providing a better flavor contrast against the sweet watermelon.
Watermelon salad becomes watery if it sits too long after being salted or if the watermelon wasn’t properly chilled. To prevent this, serve immediately after assembly and use a slotted spoon if necessary.
The Ultimate Chilled Watermelon Salad Recipe
Watermelon Salad with Feta, Mint, and Honey Lime Glaze
Ingredients
Equipment
Method
- Slice the red onion into paper-thin rings and submerge in ice-cold water for 10 minutes to ensure they become translucent and crisp.
- Stack mint leaves, roll tightly, and slice into thin emerald ribbons.
- Cut the watermelon into 1-inch uniform cubes and chill in the refrigerator to achieve a crisp, matte surface texture.
- Whisk lime juice and honey together until a glossy, shimmering emulsion forms.
- Layer watermelon cubes in a bowl, top with drained onion rings, crumbled feta, and mint. Drizzle with the honey-lime glaze and finish with salt and pepper.
Notes
Use a shallow wooden bowl to enhance the rustic aesthetic of the vibrant red and green colors.
Final Thoughts on the Ultimate Summer Refresher
Mastering the watermelon salad is about respecting the ingredients. By focusing on the visual cues—the shimmer of the glaze, the translucency of the onions, and the deep red of the fruit—you create an experience that is as beautiful as it is delicious. This dish proves that simple, fresh ingredients, when handled with professional technique, can outshine the most complex recipes.
We would love to see your creations! If you enjoyed this guide, please leave a comment below and share your photos with us. Don’t forget to follow amber_bakes on Pinterest for more visually-driven recipe inspiration and summer hosting tips.