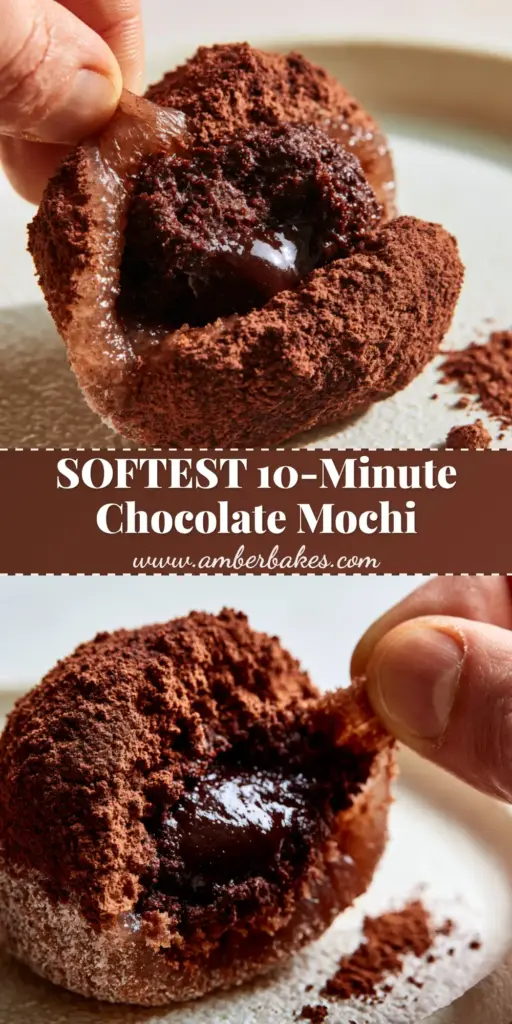
There is a specific, almost hypnotic satisfaction in watching a piece of chocolate mochi being pulled apart. The way the elastic, cocoa-brown dough stretches to its absolute limit before revealing a glossy, molten core is a culinary experience unlike any other. This recipe isn’t just about flavor; it is about achieving that perfect “QQ” texture—the Taiwanese term for a bouncy, rubbery, and incredibly chewy mouthfeel.
Inspired by the velvety textures of artisanal Japanese wagashi, this version takes the traditional rice cake and infuses it with deep, dark cocoa. Every bite offers a contrast between the matte, bitter dusting of raw cocoa powder and the sweet, flowing lava of a high-quality dark chocolate ganache. Whether you are a seasoned mochi maker or a curious home cook, this guide will help you master the delicate balance of moisture and elasticity.
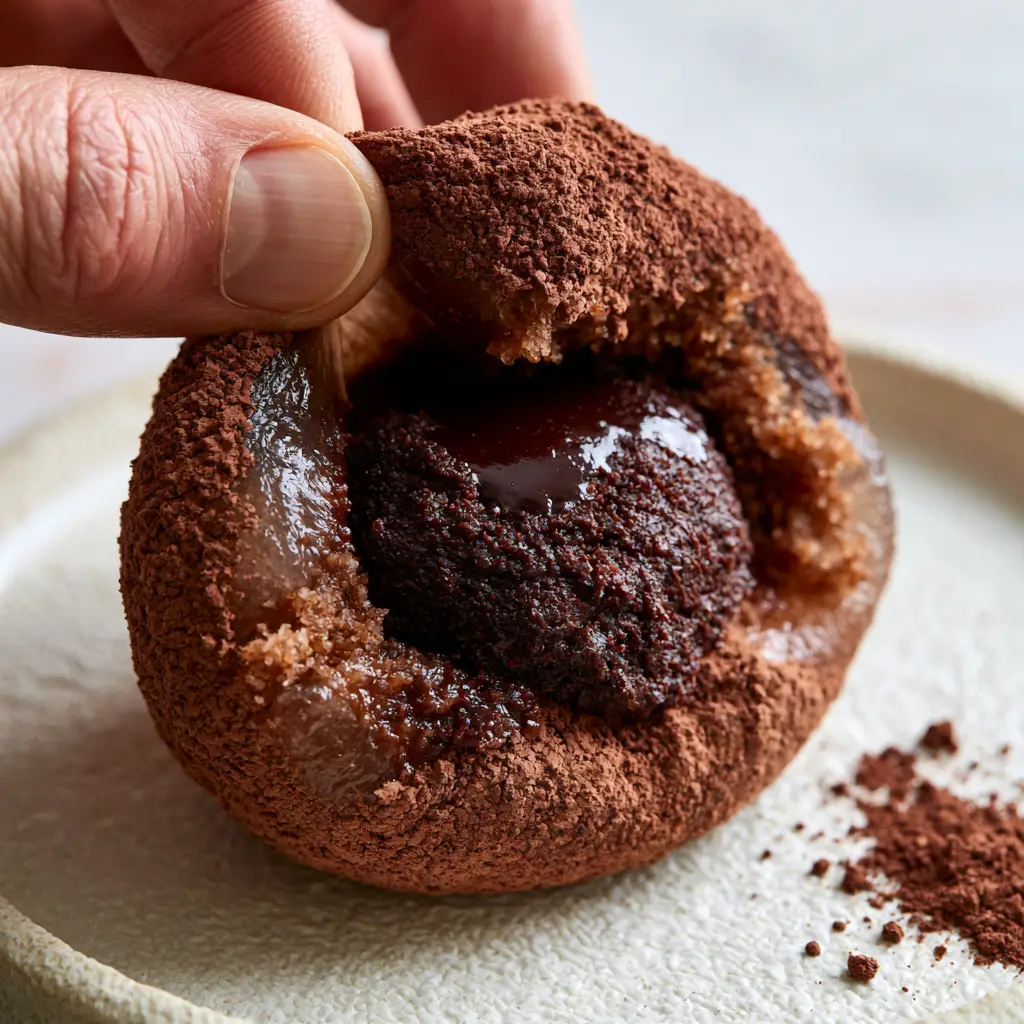
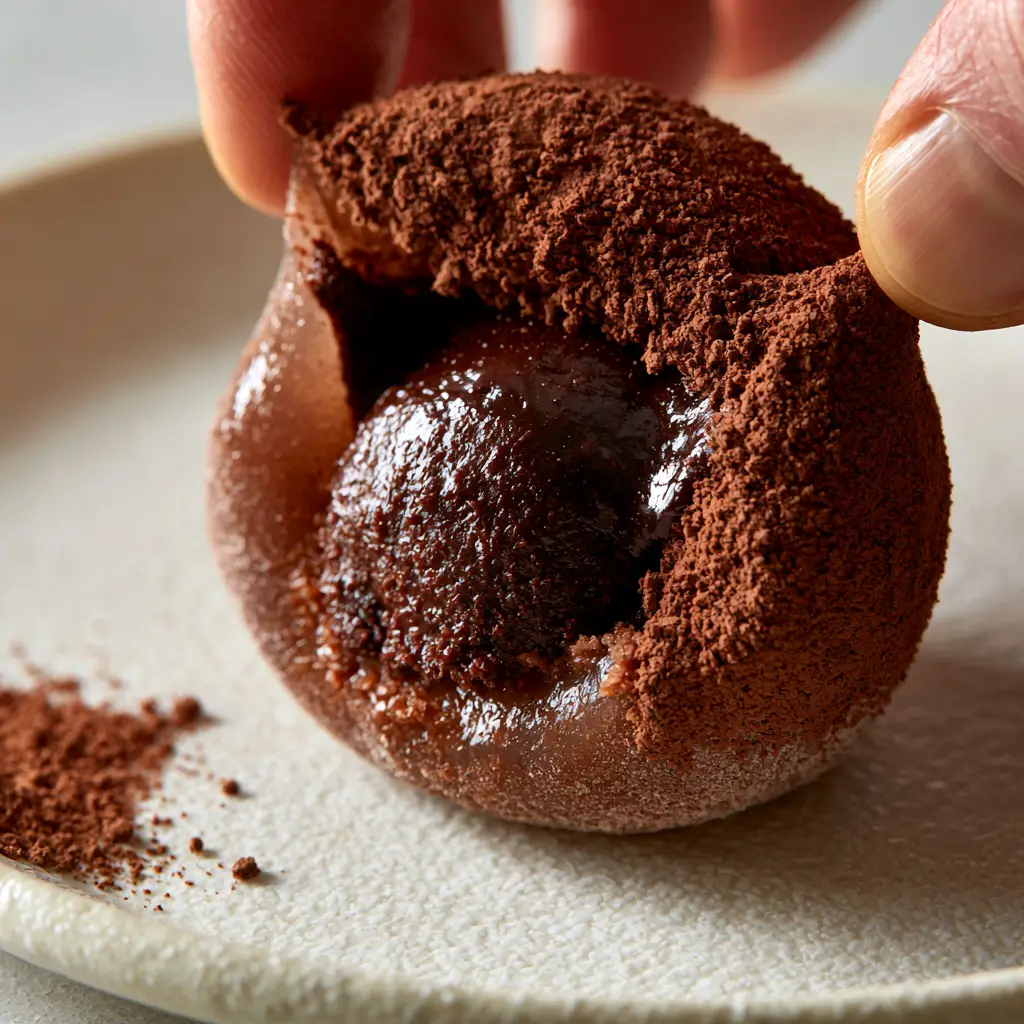
The visual appeal of this dish is undeniable. Imagine a macro view: your hand gently pulls at the soft, translucent brown exterior, highlighting the incredible stretch of the glutinous rice. As the dough gives way, a dense and shiny chocolate center begins to ooze out, perfectly captured against the backdrop of a textured ceramic plate. This is the ultimate treat for those who appreciate the intersection of science and sweets.
Why You Will Crave This Molten Chocolate Mochi
- The Ultimate Stretch: We use specific steaming techniques to ensure the glutinous rice dough achieves maximum elasticity, just like the professional “hand-pulled” versions.
- Double Chocolate Intensity: Between the cocoa-infused dough, the ganache center, and the cocoa dusting, this is a multi-layered chocolate experience.
- Perfect Textural Contrast: The matte, powdery exterior meets a soft, chewy middle and a liquid, molten heart.
- Naturally Gluten-Free: Using 100% glutinous rice flour makes this a decadent dessert accessible to almost everyone.
The Anatomy of a Perfect Chocolate Mochi: Essential Ingredients
To achieve the specific visual results of a translucent dough and a glossy center, you cannot take shortcuts with your ingredients. Each component serves a vital structural and sensory purpose.
The Foundational Glutinous Rice Flour
1 ½ cups (200g) Glutinous Rice Flour (Mochiko): This is the most critical ingredient. Unlike regular rice flour, glutinous rice flour (often labeled as Mochiko) provides the hallmark sticky and elastic texture essential for chocolate mochi. Do not substitute this with “sweet rice flour” unless it is specifically the short-grain, glutinous variety.
The Dark Cocoa Infrastructure
3 tbsp (25g) Unsweetened Dutch-Processed Cocoa Powder: For the dough, we use Dutch-processed cocoa to achieve that deep, translucent cocoa-brown color. Extra for dusting: You will need a generous amount of dark cocoa powder to provide that matte, velvety finish seen in professional photography.
The Molten Ganache Core
4 oz (115g) High-Quality Dark Chocolate (60-70% Cacao): The quality of your chocolate dictates the glossiness and flow of the center. ½ cup (120ml) Heavy Cream: This creates the emulsion necessary for a molten, rather than solid, chocolate interior.
Invisible Structural Ingredients
¼ cup (50g) Granulated Sugar: Sugar isn’t just for sweetness; it interferes with the starch molecules to keep the mochi soft and pliable for a longer period. 1 cup (240ml) Water: The hydration level is key to ensuring the dough is translucent rather than chalky.
Precision Tools for Mochi Mastery
Achieving the look of a professional handheld smartphone photo requires precision in the kitchen. You will need a heat-proof glass bowl for steaming the dough and a silicone spatula to handle the incredibly sticky mixture. A fine-mesh sieve is non-negotiable for achieving that perfectly even, velvety cocoa dusting on the exterior.
If you enjoy experimenting with different textures in your desserts, you might also want to try our tropical mango mochi or the delicate floral notes of fresh peach mochi. Having a digital kitchen scale is also highly recommended, as mochi is very sensitive to flour-to-liquid ratios.
Step-by-Step Instructions for the Perfect QQ Texture
Phase 1: Crafting the Glossy Ganache Center
Finely chop your dark chocolate and place it in a small heat-proof bowl. In a small saucepan, heat the heavy cream until it just begins to simmer—do not let it reach a rolling boil. Pour the hot cream over the chocolate and let it sit undisturbed for 5 minutes.
Gently whisk from the center outward until a dense, glossy, and smooth emulsion forms. Transfer the ganache to the refrigerator for about 45-60 minutes. You want it firm enough to scoop into balls but not rock hard; it needs to remain capable of melting back into a molten state when it hits room temperature or is briefly warmed.
Phase 2: Preparing the Translucent Chocolate Dough
In your heat-proof glass bowl, whisk together the glutinous rice flour, sugar, and the 3 tablespoons of cocoa powder. Slowly stream in the water while whisking constantly to prevent lumps. The mixture will look like a thin, muddy liquid at this stage.
Cover the bowl with plastic wrap (leave a small vent) or a damp cloth and place it in a steamer over boiling water. Steam for 15-20 minutes. Visual Cue: The dough is ready when it changes from an opaque, light brown liquid to a darker, translucent cocoa-brown solid that is very sticky and slightly matte on the surface.
Phase 3: The Kneading and Stretching Process
Once steamed, use a wet silicone spatula to vigorously stir the dough for 2-3 minutes. This “kneading” process aligns the starch molecules, which is what creates the extreme elasticity and “QQ” texture seen in the macro pull shots. The dough should become glossy and very difficult to stir.
Phase 4: Assembly and Finishing Touches
Dust a clean work surface generously with dark cocoa powder. Turn the warm dough out onto the powder. Divide the dough into 8-10 equal pieces. Flatten a piece of dough into a disc, place a chilled ball of ganache in the center, and pinch the edges of the dough together to seal. Roll it gently between your palms to form a sphere.
Expert Tips for Success
- Temperature Control: If the dough is too hot, it will melt the ganache immediately, making it impossible to seal. Let the dough cool slightly until it is warm to the touch, but not piping hot.
- Anti-Stick Strategy: Keep your hands and work surface well-dusted with cocoa powder. If the dough sticks to your hands, you won’t be able to achieve that smooth, rounded look.
- The “Pull” Factor: To get that perfect stretchy photo, serve the mochi at room temperature. If they have been refrigerated, the ganache will be solid and the dough will be less elastic.
- High-Quality Cocoa: Use the best cocoa powder you can find for the dusting. Since it’s the first thing you taste, a bitter, high-quality powder balances the sweet center perfectly.
Pairing Your Mochi with a Full Menu
While chocolate mochi is a star on its own, it works beautifully as a refreshing finish to a savory meal. Consider serving it after a light summer dinner like our grilled shrimp and avocado bowls or a crisp blueberry peach feta salad.
If you are hosting a larger gathering, these mochi pieces look stunning on a dessert platter alongside creamy mango cheesecake or a selection of refreshing summer mocktails. The matte ceramic plating mentioned in our visual blueprint helps the dark colors of the chocolate pop, making it a centerpiece-worthy dessert.
Storage, Reheating, and Freezing
Mochi is best enjoyed on the day it is made to ensure the dough remains soft and stretchy. If you must store them, place them in an airtight container at room temperature for up to 24 hours. Refrigeration will cause the rice starch to undergo recrystallization, making the dough hard and tough.
You can freeze chocolate mochi by wrapping each piece individually in plastic wrap. To eat, let them thaw at room temperature for about 2 hours. The ganache may not be as molten after freezing, but the flavor remains excellent.
Frequently Asked Questions
Yes! Mix the dough in a microwave-safe bowl, cover with plastic wrap, and microwave in 45-second intervals, stirring in between, until the dough becomes translucent and elastic. This usually takes 2-3 minutes total.
The key is the ratio of cream to chocolate and serving temperature. A higher cream content keeps it soft. Always serve at room temperature; if the mochi are cold, the ganache will solidify into a truffle-like center.
Yes, this recipe is naturally gluten-free. Despite its name, ‘glutinous’ rice flour contains no gluten; the term refers to the ‘glue-like’ sticky consistency of the rice.
Use a high-quality Dutch-processed or extra-dark cocoa powder. It provides a less acidic, smoother flavor and a deep, velvety matte finish that contrasts beautifully with the sweet dough.
Glutinous rice flour is naturally very sticky when steamed. To handle it, ensure you use a generous amount of cocoa powder or cornstarch on your hands and work surface. A wet silicone spatula also helps during the mixing phase.
The Ultimate Chocolate Mochi Recipe Card
Chocolate Mochi with a Molten Dark Chocolate Ganache Center
Ingredients
Equipment
Method
- Heat heavy cream until simmering, then pour over chopped chocolate. Let sit for 5 minutes.
- Whisk until a glossy, dense ganache forms. Chill in the fridge for 45-60 minutes until scoopable.
- Whisk rice flour, sugar, cocoa powder, and water in a heat-proof bowl until smooth.
- Steam the bowl for 15-20 minutes until the dough turns translucent cocoa-brown and solidifies.
- Stir the hot dough vigorously with a spatula for 2 minutes to develop elasticity and that QQ texture.
- Divide dough into 10 pieces. Flatten into discs and place a chilled ganache ball in the center.
- Pinch the dough to seal and roll into a ball. Dust generously with dark cocoa powder for a matte finish.
Notes
Serve at room temperature to ensure the ganache center remains molten and the dough stays stretchy.
Conclusion and Join the Amber Bakes Community
Mastering the art of chocolate mochi is a rewarding journey into the world of Japanese-inspired textures and deep cocoa flavors. The contrast of the velvety matte exterior and the molten, glossy interior creates a sensory experience that is as beautiful to look at as it is delicious to eat. We hope this recipe helps you achieve that perfect, elastic stretch you’ve been dreaming of!
If you enjoyed this recipe, please leave a comment below and share your results! Don’t forget to follow us on Pinterest for more visually stunning dessert inspiration. Happy baking!