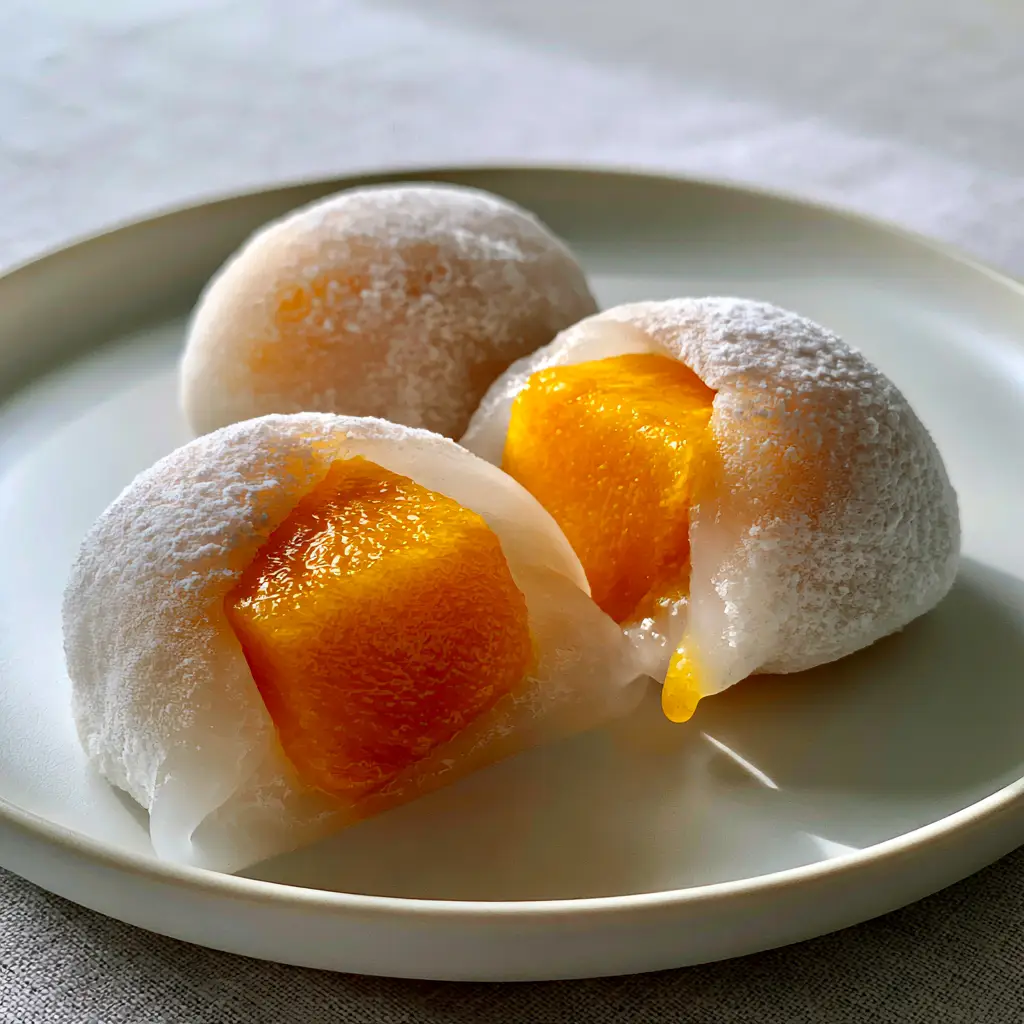
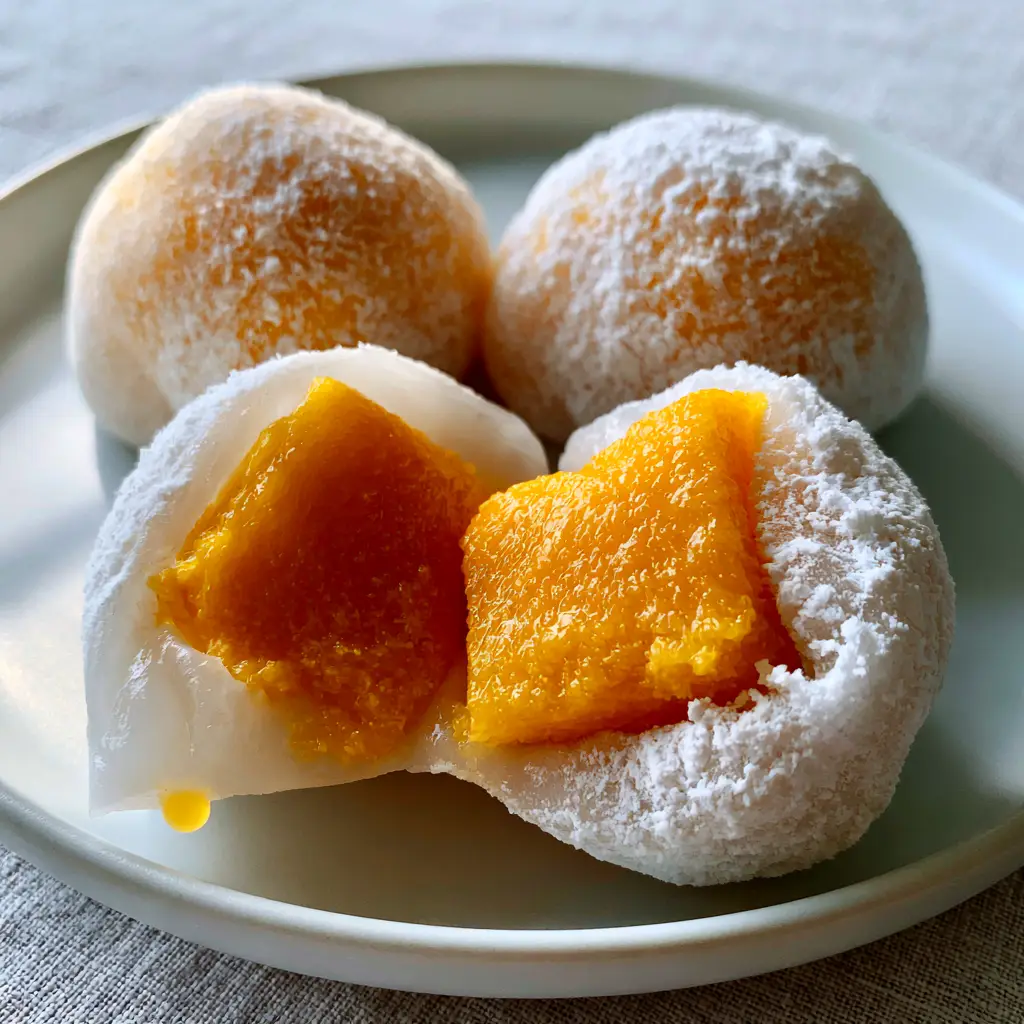
There is nothing quite like the sensory experience of a perfectly crafted mango mochi. Imagine a dessert so supple that it yields to the slightest touch, revealing a vibrant, sun-ripened treasure inside. This recipe captures that exact moment—the delicate balance between a milky-white, stretchy outer layer and the burst of neon-orange juice from a fresh mango cube.
Inspired by the minimalist elegance of high-end Japanese confectionery, our mango mochi is designed to be as visually stunning as it is delicious. By focusing on the “Q-texture”—that elusive, bouncy chewiness prized in Asian desserts—we have developed a method that ensures your mochi remains soft and translucent even after chilling. Whether you are a seasoned wagashi maker or a first-time experimenter, this guide will lead you to professional-grade results.
Why This Stretchy Mango Mochi Recipe Works
- Visually Translucent Skin: We use a specific ratio of glutinous rice flour and sugar to achieve a milky-white, semi-transparent finish that allows the vibrant mango color to peek through.
- Perfect Q-Texture: Through precise steaming or microwaving, the dough develops a “subtle bounce” that is soft enough to melt but firm enough to hold its plump, round shape.
- Sun-Ripened Core: Instead of purees or pastes, we use large, intact cubes of fresh mango, ensuring a glistening droplet of juice in every cut section.
- Long-Lasting Supple State: Our technique prevents the dough from becoming tough or chalky, maintaining that “freshly dusted” silk texture for hours.
The Essential Pantry for Authentic Mango Mochi
To achieve the specific visual blueprint of a plump, round dessert with a fine white dusting, you need high-quality foundational ingredients. Each component serves a scientific purpose in the structural integrity of the mango mochi.
Glutinous Rice Flour (Mochiko): 1 ½ cups (200g). This is the backbone of the recipe. Unlike regular rice flour, glutinous rice flour provides the characteristic “stretch” and “pull” required for a traditional mochi skin.
Granulated Sugar: ½ cup (100g). Sugar is not just for sweetness; it acts as a humectant. It keeps the rice starch molecules hydrated, which prevents the mango mochi from hardening as it cools.
Whole Milk (or Coconut Milk): 1 cup (240ml). Using a fat-containing liquid instead of water creates that “milky-white” visual described in the blueprint. It adds a subtle richness that complements the tropical fruit.
Fresh Sun-Ripened Mangoes: 2 large (approx. 400g). Look for Champagne (Ataulfo) mangoes for their fiberless, buttery texture and neon-orange interior. They must be ripe but firm enough to hold a cubic shape.
White Cornstarch (or Potato Starch): ½ cup (65g), for dusting. This provides the “silk-textured” finish. It prevents the sticky dough from adhering to your hands and the plate without affecting the flavor profile.
Refined Coconut Oil: 1 tbsp (15g). A small amount of neutral oil added to the dough ensures a glossy, supple finish and makes the dough easier to handle during the stretching process.
Tools for Achieving a Professional Finish
To recreate the macro-perfect look of three plump balls on a white ceramic plate, you will need a few specific kitchen tools. The right equipment ensures the dough is cooked evenly and the assembly is clean.
- Microwave-Safe Glass Bowl: Essential for the quick-cook method, allowing you to monitor the dough as it transitions from opaque to translucent.
- Silicone Spatula: The best tool for folding the sticky dough without tearing the delicate protein strands of the rice flour.
- Fine Mesh Sieve: Used to apply the “fine dusting” of cornstarch evenly, avoiding clumps that would ruin the macro visual.
- Sharp Chef’s Knife: Necessary to create the clean, glistening cut edge that reveals the centered mango cube.
- Plastic Wrap: Used to help shape the balls and keep them airtight during the brief chilling phase.
Mastering the Art of Mochi Making: Step-by-Step
Making mango mochi is a process that rewards patience and temperature control. Follow these steps to ensure your final product matches the “plump and round” visual prompt perfectly.
Step 1: Preparing the Vibrant Mango Centers
Begin by peeling your sun-ripened mangoes. Cut the flesh away from the pit in large “cheeks.” Slice these cheeks into uniform 1-inch (2.5cm) cubes. Place the cubes on a paper towel-lined tray to absorb excess surface moisture; this ensures the mochi skin adheres to the fruit rather than sliding off. Keep these chilled while you prepare the dough.
Step 2: Whisking the Milky-White Base
In your glass bowl, whisk together the 1 ½ cups (200g) of glutinous rice flour and ½ cup (100g) of sugar. Gradually pour in the 1 cup (240ml) of milk and 1 tbsp (15g) of oil. Whisk until the batter is completely smooth with no lumps. The mixture should look like thick heavy cream—this is the foundation for the translucent, milky-white skin.
Step 3: Steaming for the Perfect Q-Texture
Cover the bowl loosely with microwave-safe wrap. Microwave on high for 2 minutes. Remove and stir vigorously with your silicone spatula. The dough will be patchy. Microwave for another 1 minute until the dough becomes a singular, translucent, and incredibly stretchy mass. It should have a visible “bounce” when poked with the spatula.
Step 4: The Silky Dusting and Cutting
Generously dust a clean work surface with white cornstarch. Turn the hot dough out onto the starch. Use a sifted layer of starch on top of the dough to prevent sticking. Flatten the dough into a disc and cut it into 8 equal portions. Each piece should feel soft and supple, like a warm marshmallow.
Step 5: Assembling the Plump Mochi Balls
Take one portion of dough and flatten it into a 3-inch circle, keeping the edges thinner than the center. Place a chilled mango cube in the middle. Gently pull the edges of the dough over the mango, pinching the bottom to seal. The dough should be thin enough to be translucent but strong enough to hold the weight of the fruit. Roll the ball between your palms to ensure it is perfectly round.
Expert Tips for a Translucent Mochi Skin
- Don’t Overcook: If the dough becomes too yellow or tough, it has been cooked too long. Stop as soon as it turns translucent to maintain the “supple state.”
- Work While Warm: Mochi dough is most elastic when it is warm. As it cools, it becomes less “stretchy,” making it harder to get that perfectly centered mango cube.
- Sift the Starch: For that “white silk-textured” look seen in the macro photos, always sift your cornstarch. Heavy clumps of starch will make the mochi look dry rather than delicate.
- The “Chill” Factor: For the best flavor, refrigerate the finished mango mochi for 20 minutes before serving. This sets the Q-texture and makes the mango juice even more refreshing.
How to Store Your Tropical Sweets
Because this mango mochi contains fresh fruit and high-moisture dough, it is best enjoyed within 24 hours. To keep them soft, place the balls in an airtight container lined with parchment paper. If you must store them longer, wrap each ball individually in plastic wrap to prevent the “milky-white” skin from drying out. Avoid long-term refrigeration, as the cold will eventually cause the rice starch to recrystallize, losing the signature bounce.
Tropical Pairings and Serving Suggestions
This dessert shines when served as part of a larger tropical spread. If you enjoy the chewiness of glutinous rice, you might also love our mango pancake which offers a similar fruit-and-cream profile. For those who want to explore different fillings, try our peach mochi for a floral twist or the decadent chocolate mochi for a richer treat.
If you are serving these at a summer gathering, they pair beautifully with summer mocktails or a crisp blueberry peach feta salad for a balanced lunch. The vibrant neon-orange of the mango also complements a spicy main course like mexican barbecue chicken skewers.
Frequently Asked Questions
No, you must use glutinous rice flour (such as Mochiko). Regular rice flour does not contain the starch profile necessary to create the stretchy, bouncy ‘Q-texture’ that defines mochi.
Using a combination of whole milk and a small amount of oil helps create an opaque white color that turns beautifully translucent once the rice starch is fully gelatinized during cooking.
Because it contains fresh fruit, it is best eaten the day it is made. It can be stored in an airtight container at room temperature for up to 24 hours, but the texture will eventually firm up.
Cold temperatures cause the starch to crystallize. You can try microwaving it for 5-10 seconds to soften it, but be careful not to cook the fresh mango inside.
Mochi dough is naturally very sticky. The key is using a generous amount of sifted cornstarch on your hands and work surface, and handling the dough while it is still warm.
The Official Fresh Mango Mochi Recipe
Mango Mochi: The Ultimate Guide to Soft and Chewy Tropical Daifuku
Ingredients
Equipment
Method
- Peel the mangoes and slice the flesh into uniform 1-inch cubes. Pat dry with paper towels and chill.
- Whisk rice flour, sugar, milk, and oil in a glass bowl until smooth. Cover and microwave for 2 minutes.
- Stir the dough vigorously, then microwave for 1 more minute until it becomes translucent and stretchy with a visible bounce.
- Turn dough onto a cornstarch-dusted surface. Divide into 8 equal pieces while still warm and supple.
- Flatten a piece of dough, place a mango cube in the center, and pinch the edges to seal into a plump round ball.
Notes
Work with the dough while it is warm for the best seal.
Share Your Tropical Creations!
Creating the perfect mango mochi is a culinary accomplishment that deserves to be shared. The contrast of the silk-dusted white skin against the juicy orange interior is a photographer’s dream. We would love to see your results! Tag us in your photos and be sure to pin this recipe to your favorite dessert boards on Pinterest so you can find it every time mango season rolls around.