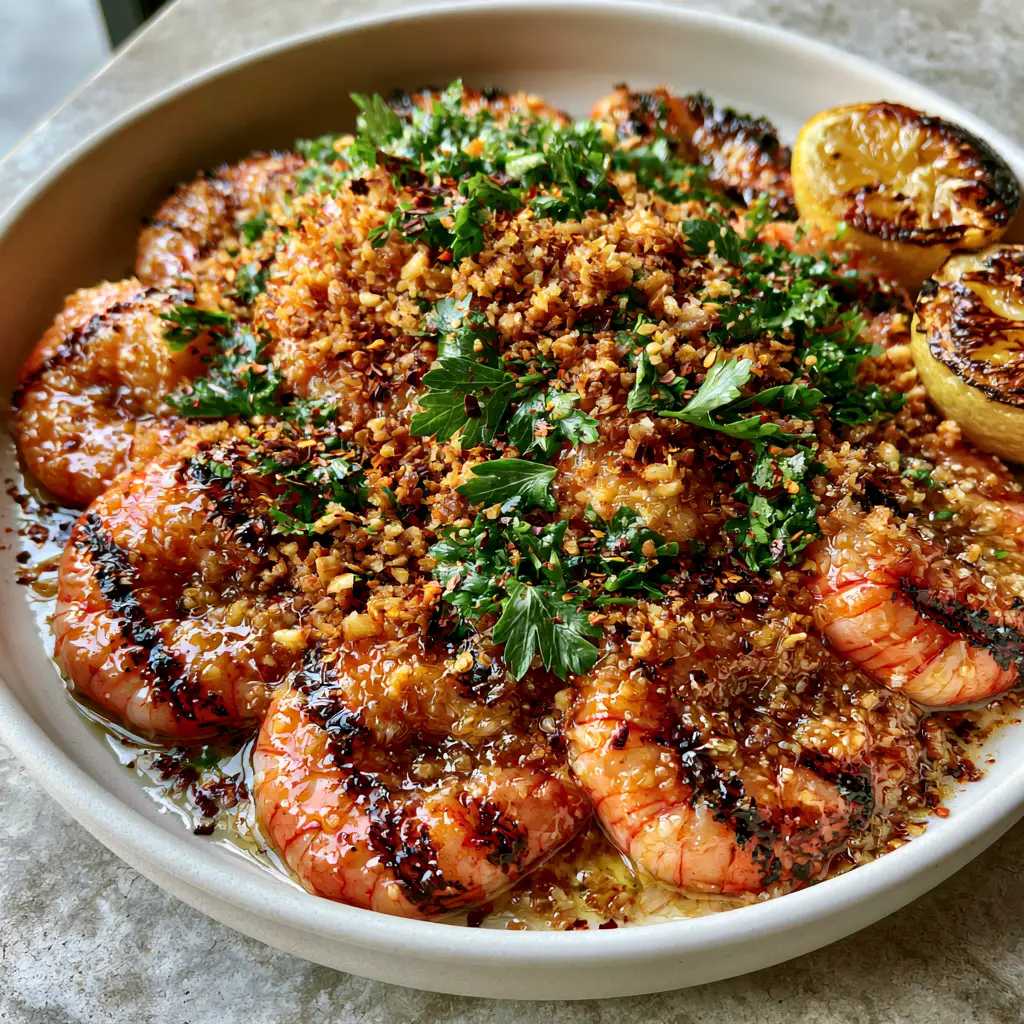
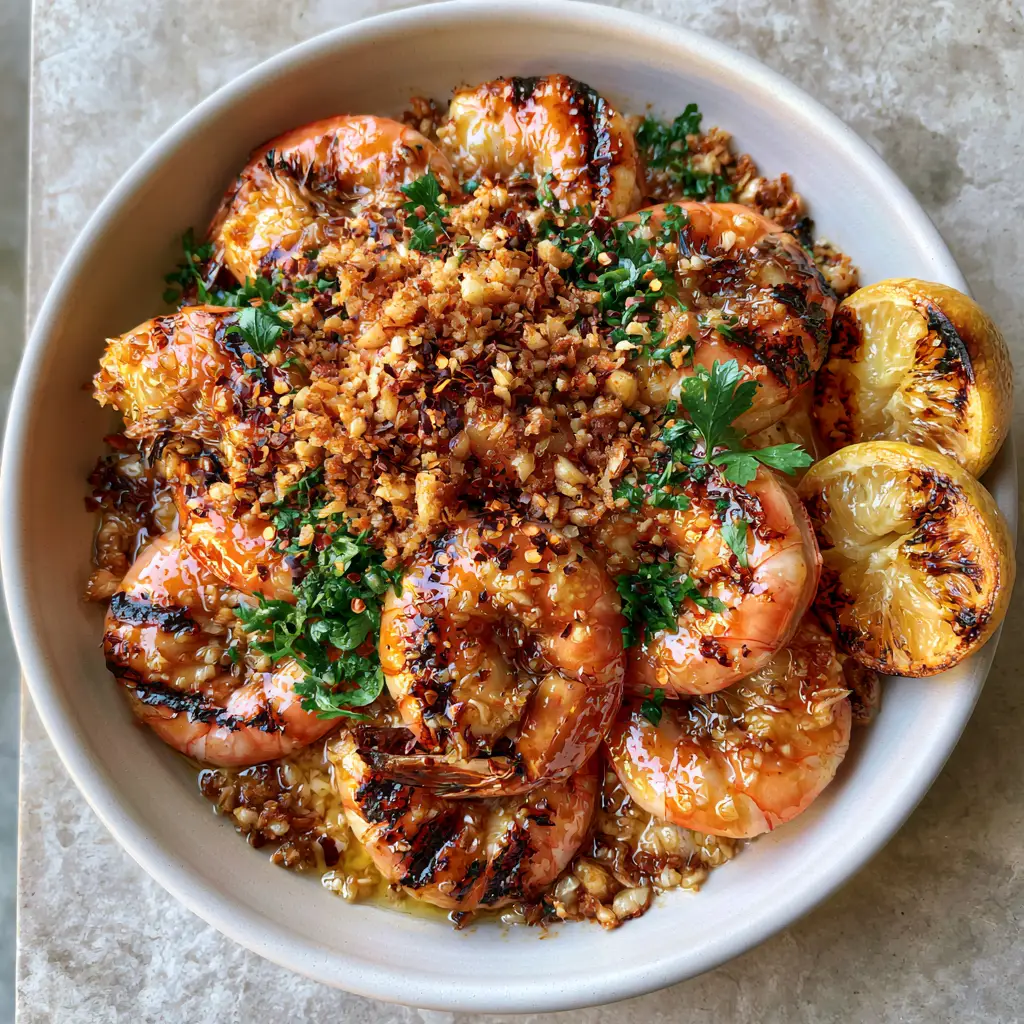
There is a specific kind of culinary magic that happens when high heat meets succulent seafood. This Grilled shrimp recipe is designed to capture that exact moment: the instant the shrimp transition from translucent to a vibrant, opaque pink, marked by deep, dark caramelized grill char. If you have been searching for a dish that looks like a professional food photograph—plump, shimmering with a thick garlic butter glaze, and topped with the crunch of golden-brown toasted garlic—you have arrived at the right place.
Achieving the perfect sear without overcooking the delicate protein is an art form. In this guide, we will break down the science of the Maillard reaction on shellfish and how to create a sauce that clings to every ridge of the shrimp. We are moving beyond basic seasoning into a world of layered textures, from the emerald green of fresh parsley to the bright, acidic pop of caramelized lemon wedges.
Why This Is The Ultimate Grilled Shrimp Recipe
- Visual Contrast: The juxtaposition of the vibrant pink shrimp against dark, smoky char marks creates a restaurant-quality presentation.
- Textural Complexity: You get the snap of the shrimp, the silkiness of the melted butter, and the distinct crunch of toasted minced garlic bits.
- Concentrated Flavor: By grilling the lemon wedges, we transform sharp acidity into a mellow, smoky sweetness that cuts through the rich garlic butter.
- Scientific Precision: This recipe utilizes high-heat mechanics to ensure the shrimp remain juicy inside while developing a savory crust outside.
The Essential Components for Succulent Seafood
Every ingredient in this Grilled shrimp recipe serves a structural or flavor-enhancing purpose. To achieve the visual and gustatory results described in our blueprint, quality and preparation are paramount.
Jumbo Shrimp (approx. 2 lbs / 907g): You want 16/20 count shrimp to ensure they have enough surface area to develop a char without drying out. Larger shrimp hold onto the garlic glaze more effectively than smaller varieties.
Unsalted Butter (1/2 cup / 113g): Using unsalted butter allows you to control the sodium levels perfectly. This will be melted and infused with garlic to create that shimmering, thick glaze seen in the visual prompt.
Fresh Garlic (6-8 cloves): You will need both finely minced garlic for the butter glaze and larger bits for the toasted garlic topping. Garlic provides the foundational umami that defines this dish.
Flat-Leaf Parsley (1/2 cup / 15g, chopped): Also known as Italian parsley, this adds a bright emerald green color and a fresh, herbaceous finish that balances the heavy butter.
Dried Red Pepper Flakes (1 tsp / 2g): These provide “tiny sparks” of heat and color. They are essential for breaking up the visual monotony of the pink and gold tones.
Lemons (2 large): We will be halving and grilling these. The heat caramelizes the natural sugars in the citrus, creating a “juicy lemon with caramelized edges” as described in the blueprint.
Extra Virgin Olive Oil (2 tbsp / 30ml): This is a foundational invisible ingredient. Coating the shrimp in oil before they hit the grates ensures they don’t stick and helps conduct heat for those dark char marks.
Kosher Salt and Coarse Black Pepper: These are scientifically required to draw out just enough moisture to allow the proteins to brown effectively on the grill.
Necessary Tools for Grill Mastery
To replicate the authentic, handheld smartphone aesthetic of a perfectly layered bowl of shrimp, you need the right gear. A high-quality grill is the obvious start, but the nuances matter.
You will need a wide, shallow matte-white ceramic bowl for serving. This specific vessel allows you to layer the shrimp upward, creating that “overflowing” look. Long metal skewers or a perforated grill basket are helpful, though grilling directly on the grates provides the most distinct char marks. A small heavy-bottomed saucepan is required for the garlic butter infusion to ensure the garlic toasts evenly without burning.
The Culinary Blueprint: Step-by-Step Instructions
Preparing the Shrimp for Maximum Char
Start by ensuring your shrimp are completely dry. Use paper towels to pat down the 2 lbs (907g) of jumbo shrimp. Moisture is the enemy of the sear; if the shrimp are wet, they will steam rather than char. In a large bowl, toss the shrimp with 2 tbsp (30ml) of olive oil, 1 tsp (6g) of kosher salt, and 1/2 tsp (1g) of black pepper. This thin layer of oil is what creates the “vibrant opaque pink” hue once the heat hits the shells or flesh.
If you are looking for more seafood inspiration, consider how this preparation differs from a grilled fish tacos setup, where the texture is often softer and flakes more easily.
Infusing the Shimmering Garlic Butter Glaze
While the grill preheats to high (about 450°F / 230°C), place your saucepan over medium-low heat. Add the 1/2 cup (113g) of butter and the minced garlic. Watch for sensory cues: the butter will begin to foam, and the garlic will start to release a nutty aroma. Cook until the garlic bits become a light golden-brown. Remove half of the garlic bits with a slotted spoon and set them aside on a paper towel—these will be your “toasted minced garlic bits” for the final topping. The remaining butter will become the “thick, shimmering garlic butter sauce.”
Achieving the Perfect Grill Marks
Place the shrimp on the hot grates. You should hear an immediate, aggressive sizzle. This sound indicates the Maillard reaction is beginning. Grill for 2-3 minutes per side. Look for the “dark caramelized grill char marks on the ridges” mentioned in the visual prompt. At the same time, place your lemon halves cut-side down on the grates. The lemons are finished when the edges are blackened and the centers are bulging with hot, sweet juice.
Layering the Textures and Flavors
Transfer the grilled shrimp into your matte-white ceramic bowl. Immediately pour the warm garlic butter glaze over them, tossing gently to ensure every shrimp caught the light with a glossy coating. Now, perform the final layering: scatter the reserved toasted garlic bits, the bright emerald green chopped flat-leaf parsley, and the red pepper flakes over the top. Nestled the charred lemon halves in the corner to complete the visual recipe blueprint.
Expert Tips for Recipe Success
- Don’t Overcrowd the Grill: If you put too many shrimp on at once, the grill temperature will drop, and you won’t get those distinct dark ridges. Work in batches if necessary.
- The Carryover Cook: Remove the shrimp from the heat when they are just barely opaque. The residual heat will finish the cooking process while they are being tossed in the butter, keeping them “plump and succulent.”
- Garlic Temperature Control: Garlic burns quickly. If your toasted bits turn dark brown or black, they will be bitter. Aim for the color of a penny.
- Lemon Selection: Use thin-skinned Meyer lemons if available; they caramelize more deeply and provide a sweeter juice for the final squeeze.
Optimal Storage and Reheating
This Grilled shrimp recipe is best enjoyed immediately while the butter is fluid and the shrimp are at their peak texture. However, leftovers can be stored in an airtight container in the refrigerator for up to two days. To reheat, avoid the microwave, which will turn the shrimp rubbery. Instead, sauté them briefly in a pan over medium heat with an extra splash of water or butter to loosen the sauce.
The Best Pairings for Your Grilled Feast
To turn this into a complete meal, consider serving the shrimp over a bed of lemon feta orzo shrimp to double down on the citrus notes. If you want a side that matches the summer vibe, a macaroni salad or a refreshing caprese salad provides a cool contrast to the hot, spicy shrimp. For a fruit-forward finish, a mango recipe or a side of fruit salsa complements the smoky char perfectly.
Frequently Asked Questions
Absolutely. Just ensure they are fully thawed and patted extremely dry with paper towels. Excess moisture from frozen shrimp can prevent the development of those signature dark char marks.
Ensure your grill grates are clean and preheated. Most importantly, coat the shrimp in a high-smoke-point oil like extra virgin olive oil and pat them dry before seasoning to create a barrier.
Yes, leaving the tails on not only provides a convenient ‘handle’ for eating but also adds extra flavor to the butter sauce and improves the visual presentation of the dish.
Look for the C-shape; shrimp are perfectly cooked when they curl into a ‘C’ and turn opaque pink. If they curl tightly into an ‘O’, they are likely overcooked and may be rubbery.
The Ultimate Grilled Shrimp Recipe Card
Grilled shrimp recipe with Charred Garlic Butter and Lemon
Ingredients
Equipment
Method
- Pat the 2 lbs (907g) of jumbo shrimp dry with paper towels. Toss with 2 tbsp (30ml) olive oil, 1 tsp salt, and 1/2 tsp pepper.
- Melt 1/2 cup (113g) butter in a saucepan. Add minced garlic and cook until light golden-brown. Set half of the bits aside for garnish; keep the rest in the butter.
- Place shrimp on high-heat grill grates. Cook for 2-3 minutes per side until you see dark caramelized grill char marks and the shrimp are opaque pink.
- Place lemon halves cut-side down on the grill for 3-4 minutes until the edges are caramelized.
- Layer shrimp in a white bowl. Pour shimmering garlic butter glaze over. Top with reserved toasted garlic, fresh parsley, and red pepper flakes. Serve with charred lemons.
Notes
Always pat the shrimp dry before oiling to ensure the best sear.
Closing & Call to Action
This Grilled shrimp recipe is more than just a meal; it is a sensory experience that combines the smokiness of the grill with the richness of a classic garlic butter infusion. Whether you are hosting a backyard BBQ or looking for a quick, high-protein dinner, these plump, charred shrimp are guaranteed to impress. If you enjoyed this recipe, please leave a comment below and share your photos! Don’t forget to follow me on Pinterest for more culinary inspiration.