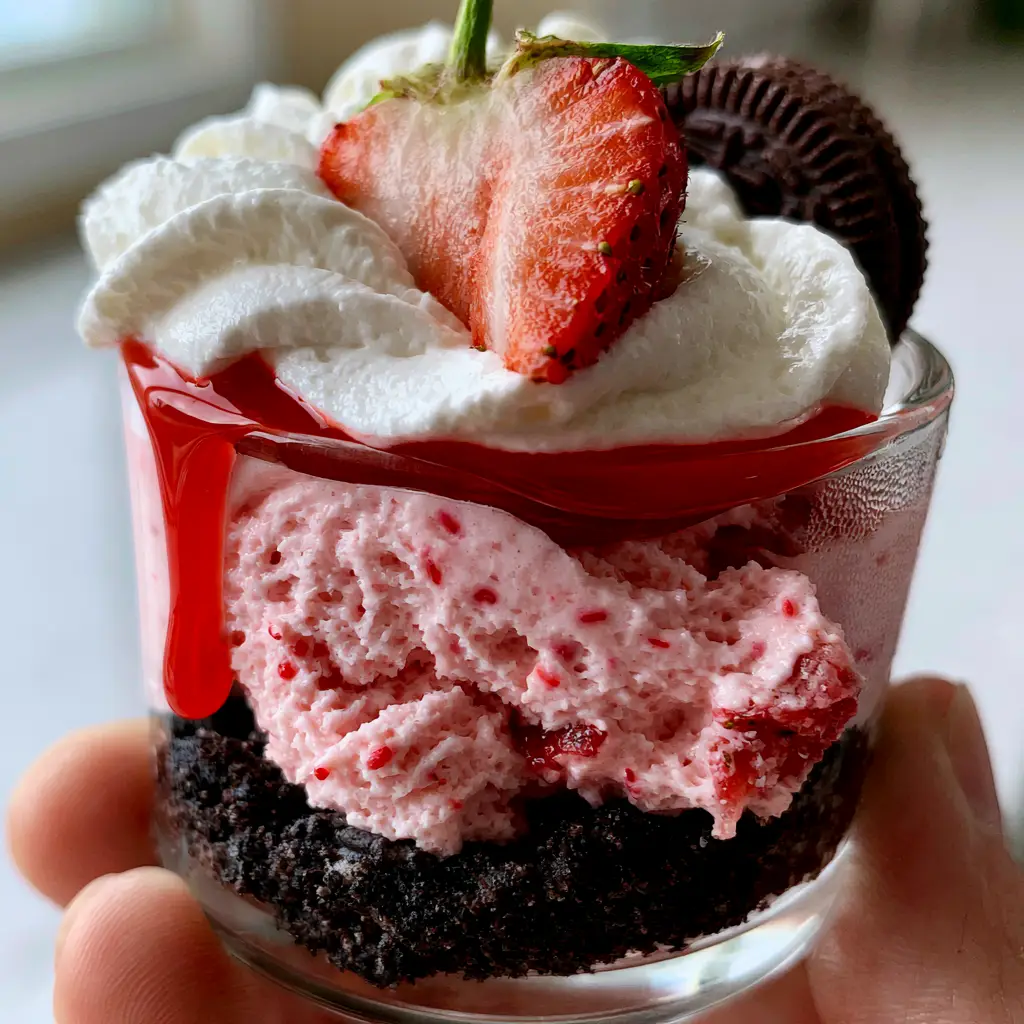
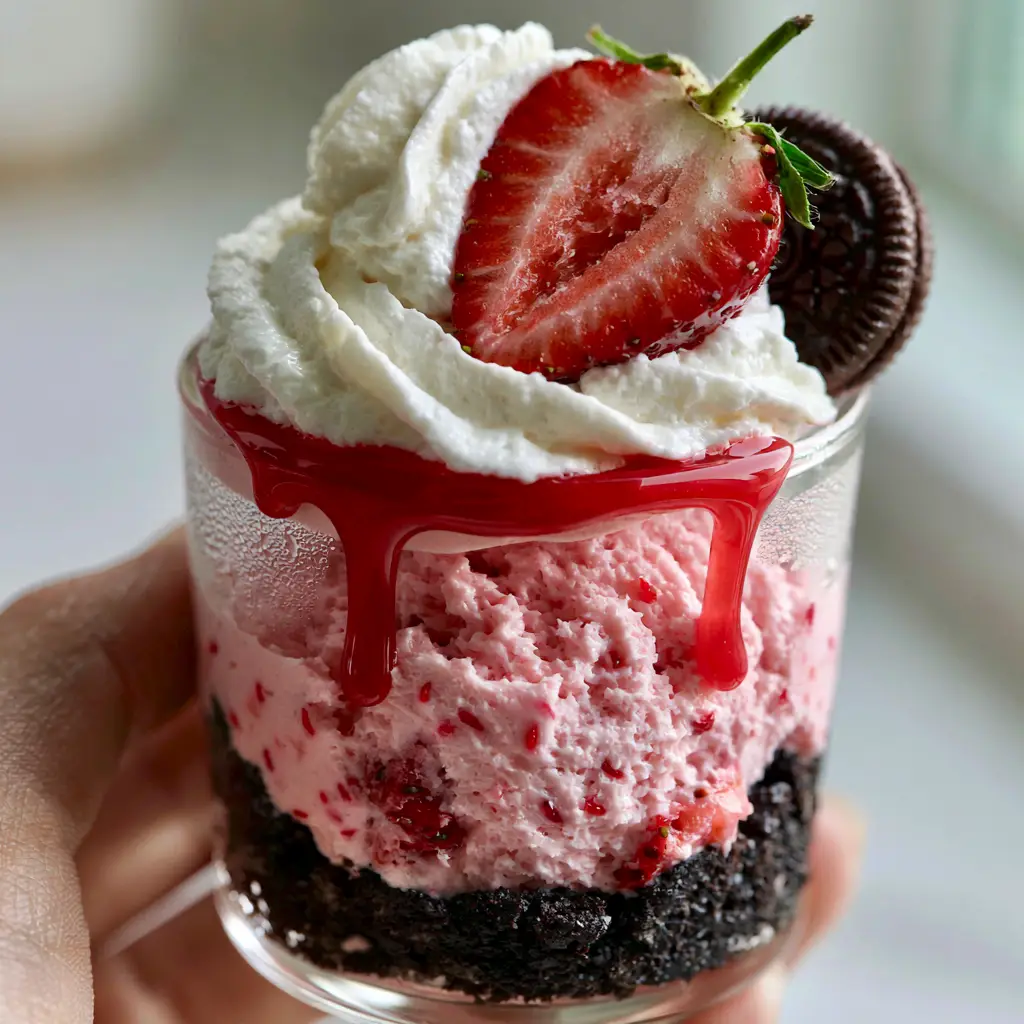
There is something undeniably magical about the combination of tart, sun-ripened berries and the deep, cocoa-rich crunch of a classic Oreo cookie. These Strawberry Oreo Cheesecake Cups aren’t just a dessert; they are a multi-sensory experience designed to be captured and shared. Imagine holding a chilled glass, its exterior kissed with light condensation, revealing perfectly defined layers of chocolate and pink velvet.
The first bite takes you through a thick, coarse foundation of dark chocolate crumbs before hitting a cloud-like, voluminous strawberry mousse. This mousse is studded with tiny red fruit flecks and real strawberry chunks, providing a burst of freshness in every spoonful. Topped with stiff-peak whipped cream and a glossy red drizzle, this is the ultimate handheld indulgence for any home cook looking to impress.
Whether you are hosting a summer garden party or looking for a sophisticated “no-bake” treat, these individual servings offer the perfect balance of elegance and ease. By focusing on high-quality ingredients and specific aeration techniques, we can achieve a professional-grade texture that looks exactly like a high-end patisserie creation. Let’s dive into the science of building the perfect dessert cup.
Why You Will Fall in Love With This No-Bake Dessert
- Textural Harmony: The contrast between the gritty, buttery Oreo base and the aerated, melt-in-your-mouth mousse creates a sophisticated mouthfeel.
- Visual Showstopper: With vibrant pink hues, glossy strawberry coulis, and the iconic green stem of a fresh strawberry wedge, these cups are a photographer’s dream.
- Make-Ahead Convenience: Since these require chilling to set the mousse, they are the perfect stress-free dessert for entertaining guests.
- Perfect Portions: Individual cups ensure every guest gets the ideal ratio of crust to filling to topping, without the mess of slicing a traditional cheesecake.
The Anatomy of Flavor: Essential Ingredients and Substitutions
Chocolate Sandwich Cookies (Oreos): You will need 24 cookies (approx. 280g) to create that signature dark, coarse base. The cocoa notes in the cookie provide a bitter-sweet counterbalance to the acidic strawberry filling.
Unsalted Butter: 4 tbsp (56g) of melted butter acts as the “glue” for your crust. It should be unsalted to allow the chocolate flavor to remain pure and prominent.
Full-Fat Cream Cheese: 16 oz (450g) of room-temperature cream cheese provides the structural integrity of the mousse. Ensure it is full-fat for that rich, tangy cheesecake essence that defines the dish.
Fresh Strawberries: You will use these in three ways: pureed for the mousse, finely diced for texture, and halved for the garnish. Fresh berries are non-negotiable for achieving the “vibrant red fruit flecks” seen in the visual blueprint.
Heavy Whipping Cream: 1.5 cups (360ml) of chilled cream is whipped to stiff peaks to provide the “voluminous, aerated” quality. This replaces the heavy density of a baked cheesecake with a lighter, mousse-like feel.
Powdered Sugar: 1 cup (120g) provides sweetness while dissolving instantly, ensuring the mousse remains perfectly smooth without any grainy texture.
Strawberry Coulis/Glaze: A high-quality store-bought glaze or a home-reduced strawberry syrup provides the “glossy drizzle.” This adds a hit of concentrated fruit flavor and a beautiful shine.
Mini Oreos: These are the final “tucked-in” flourish. Their small scale makes the dessert cup look grand and professionally styled.
The Culinary Toolbox: Equipment for Professional Results
To achieve the airy peaks and clean layers, a few specific tools are required. A food processor is ideal for achieving “coarse crumbs” rather than a fine powder, which gives the base more character. You will also need a stand mixer or electric hand mixer to aerate the heavy cream effectively; achieving stiff peaks by hand is labor-intensive and often inconsistent.
For the assembly, piping bags with large round tips are recommended. This allows you to fill the cups without smearing the sides, maintaining those crisp, visible layers. Finally, choose clear 6 oz (180ml) glass cups or jars to showcase the condensation and the “dripping” coulis against the inner glass.
Constructing the Perfect Strawberry Oreo Cheesecake Cups
Step 1: Forging the Dark Chocolate Foundation
Place your chocolate sandwich cookies into a food processor and pulse until they reach a coarse, gravel-like consistency. You want to avoid a fine sand texture; the larger bits provide a satisfying crunch that mimics a traditional tart base.
Pour in your 4 tbsp (56g) of melted butter and pulse briefly until the crumbs resemble wet sand. Press approximately 3 tbsp (45g) of the mixture into the bottom of each glass cup, using the back of a spoon to pack it firmly but not so tight that it becomes a solid block. Set these in the refrigerator to firm up while you prepare the filling.
Step 2: Preparing the Strawberry Reduction and Chunks
Wash and hull your strawberries. Take half of them and blend into a smooth puree, then simmer in a small saucepan over medium heat for 5-7 minutes until reduced by half. This concentrates the color and flavor without adding excess water to the mousse. Dice the remaining strawberries into tiny, 1/4-inch (6mm) pieces.
Allow the reduction to cool completely. This is a critical step; adding hot liquid to cream cheese will cause the mousse to break and lose its aerated volume. If you’re in a rush, a quick dip in an ice bath will do the trick.
Step 3: Whipping the Voluminous Strawberry Mousse
In a large bowl, beat the room-temperature cream cheese and powdered sugar until completely smooth and pale. Gradually fold in the cooled strawberry reduction until the mixture is a uniform, soft pink. You should start to see those “visible tiny red fruit flecks” from the concentrated puree.
In a separate chilled bowl, whip the heavy cream until stiff peaks form. Gently fold the whipped cream into the strawberry cheese mixture using a silicone spatula. Use a “cut and fold” motion to keep the air bubbles intact—this is how we achieve the “voluminous” look. Finally, fold in the diced strawberry chunks.
Step 4: Assembly and Architectural Drizzling
Transfer the mousse to a piping bag and fill each cup about 3/4 of the way full. To achieve the “glossy strawberry coulis drizzle dripping down the inner glass,” take a small spoon of glaze and run it around the inner rim of the glass before adding the mousse. As the mousse settles, it will push the glaze down in beautiful, controlled drips.
Place the cups back in the refrigerator for at least 2 hours. This allows the fats to solidify and the flavors to marry, resulting in a stable structure that can support the heavy toppings.
Step 5: The Final Flourish and Garnish
Just before serving, whip an additional 1/2 cup (120ml) of heavy cream with a tablespoon of sugar to create the “heavy dollop of stiff-peak whipped cream.” Pipe or spoon a generous mound onto the center of each cup.
Garnish with a single half-wedged fresh strawberry, leaving the green stem attached for a pop of color. Tuck a mini chocolate Oreo cookie into the side of the cream at a 45-degree angle. The contrast of the bright red berry, the white cream, and the dark cookie creates a professional, high-contrast finish.
Expert Tips for Success
- Temperature Control: Ensure your cream cheese is truly room temperature. If it is even slightly cold, you will end up with tiny white lumps in your pink mousse, ruining the “voluminous” aesthetic.
- Avoid Over-Mixing: When folding the whipped cream into the cheese base, stop as soon as no white streaks remain. Over-mixing will deflate the air, turning your mousse into a dense cream.
- The “Cold Glass” Effect: To get that beautiful condensation shown in the midjourney prompt, chill your glass cups in the freezer for 10 minutes before filling.
- Sourcing Strawberries: Look for “Driscoll’s” or local organic berries that are red all the way through. This ensures the mousse has a natural pink glow without the need for artificial food coloring.
Storage and Preparation Ahead of Time
These Strawberry Oreo Cheesecake Cups are remarkably stable. They can be stored in the refrigerator for up to 3 days. However, for the best visual results, add the whipped cream peaks, fresh strawberry wedges, and mini Oreos just before serving. The cookie base will eventually soften as it absorbs moisture from the mousse, so if you prefer a crunchier crust, serve them within 12 hours of assembly.
We do not recommend freezing these cups. The fresh strawberry chunks and the dairy-heavy mousse can change texture upon thawing, leading to a watery consistency that loses its aerated charm.
What to Serve With This Decadent Treat
This dessert is a fantastic conclusion to a variety of meals. If you are hosting a themed brunch, these cups pair beautifully with savory options like a warm cheese fatayer or a spread of traditional Arabic breakfast recipes. The sweetness of the strawberry cleanses the palate after rich, savory flavors.
For a lighter summer pairing, serve these after a refreshing strawberry watermelon salad. If you’re leaning into a fusion dinner, they follow a Lebanese kafta burger perfectly, providing a cool, creamy finish to a spiced meal.
Frequently Asked Questions
Yes, you can use frozen strawberries for the puree/reduction, but we highly recommend fresh strawberries for the ‘chunks’ and garnish to maintain the correct texture and visual appeal.
This specific recipe relies on the high fat content of the cream cheese and the stability of stiff-peaked whipped cream to set, so gelatin is not required for a mousse-like texture.
The secret is in the folding. Ensure your whipped cream is at stiff peaks and gently fold it into the cream cheese base using a spatula, rather than beating it in, to preserve air bubbles.
Because they are dairy-based, they should not sit out for more than 2 hours. Keeping them chilled also ensures the ‘cold condensation’ look on the glass remains.
If the base is too hard, you may have pressed the crumbs too firmly or used too much butter. Aim for a ‘coarse’ crumb consistency and press just enough to hold the shape.
The Ultimate Strawberry Oreo Cheesecake Cups Recipe
Strawberry Oreo Cheesecake Cups with Airy Strawberry Mousse
Ingredients
Equipment
Method
- Pulse Oreos in a food processor until coarse. Mix with melted butter and press into the bottom of 6 glass cups.
- Beat cream cheese and sugar. Fold in strawberry reduction and diced berries. Separately whip cream to stiff peaks and fold into the cheese mixture.
- Pipe mousse into cups over a strawberry glaze drizzle. Chill for 2 hours before topping with extra whipped cream, a strawberry wedge, and a mini Oreo.
Notes
Chill the glasses before assembly for a beautiful condensation effect.
Closing & Call to Action
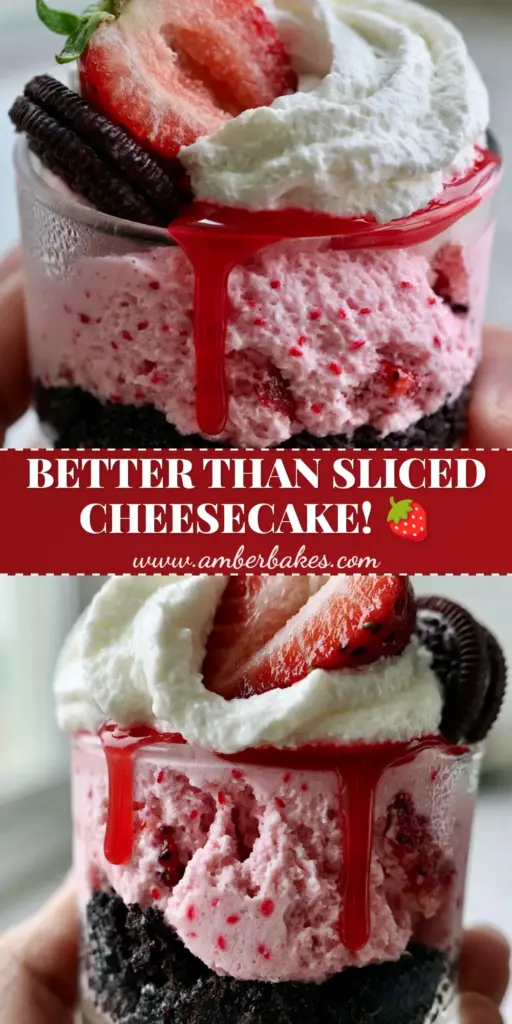
Mastering the art of the Strawberry Oreo Cheesecake Cups is a rewarding journey into the world of no-bake pastry. With its airy texture, vibrant fruit flavors, and stunning chocolate contrast, it’s a recipe that tastes even better than it looks. We hope you enjoy the process of layering and garnishing these beautiful individual desserts.
If you made this recipe, we would love to see your creations! Leave a comment below and tell us how yours turned out. Don’t forget to follow us and share your photos to Pinterest to inspire other home cooks!