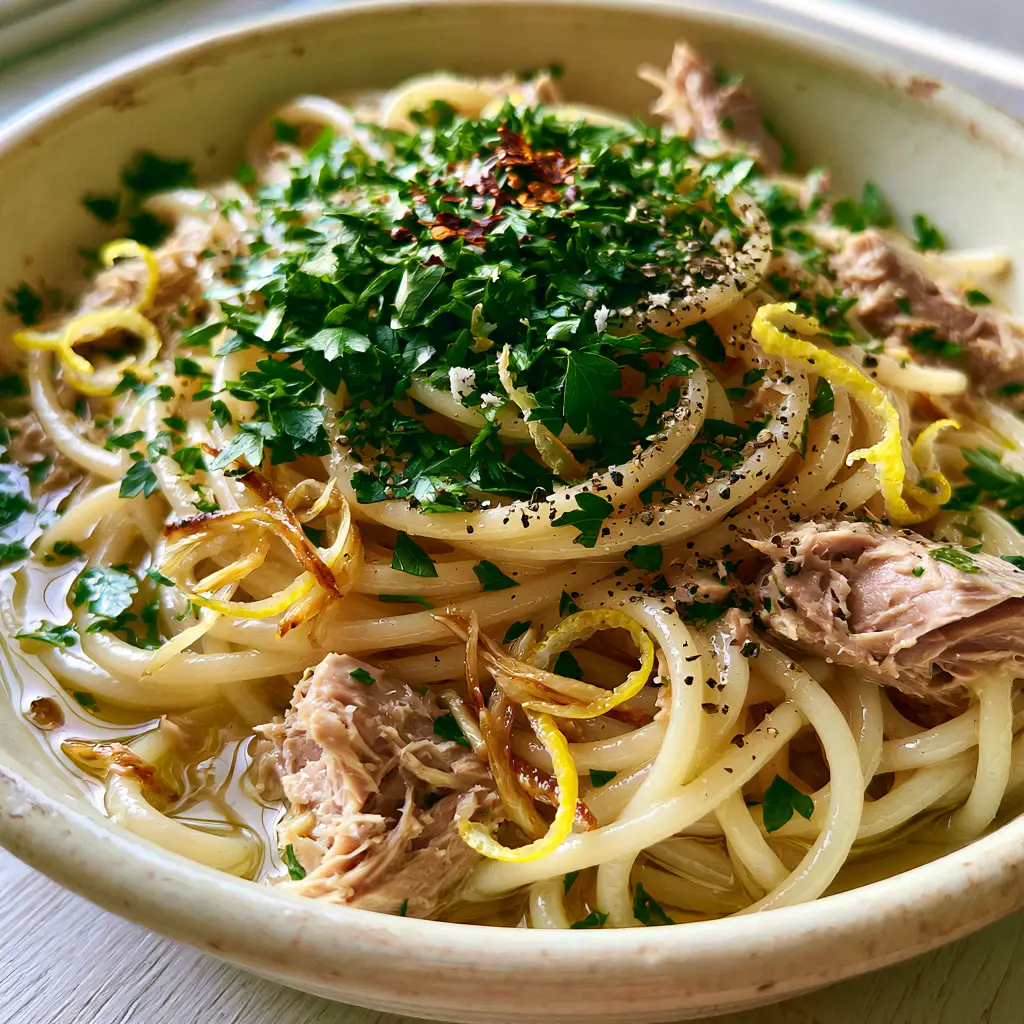
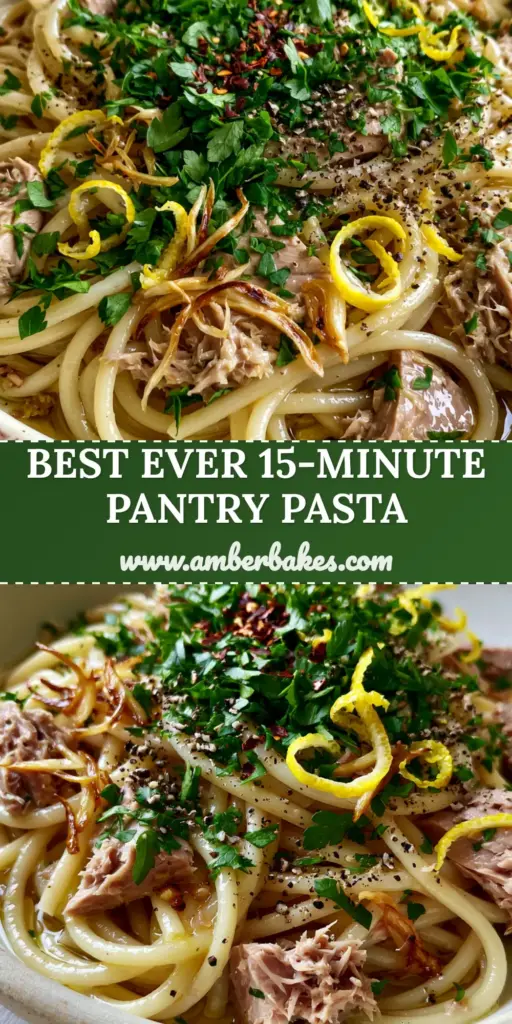
The humble pantry staple is about to undergo a gourmet transformation. This canned tuna pasta is not your average weekday meal; it is a masterclass in texture, brightness, and culinary efficiency. Imagine al dente spaghetti strands glistening under a veil of glossy extra virgin olive oil, punctuated by the sharp heat of red chili flakes and the citrusy aroma of fresh lemon zest.
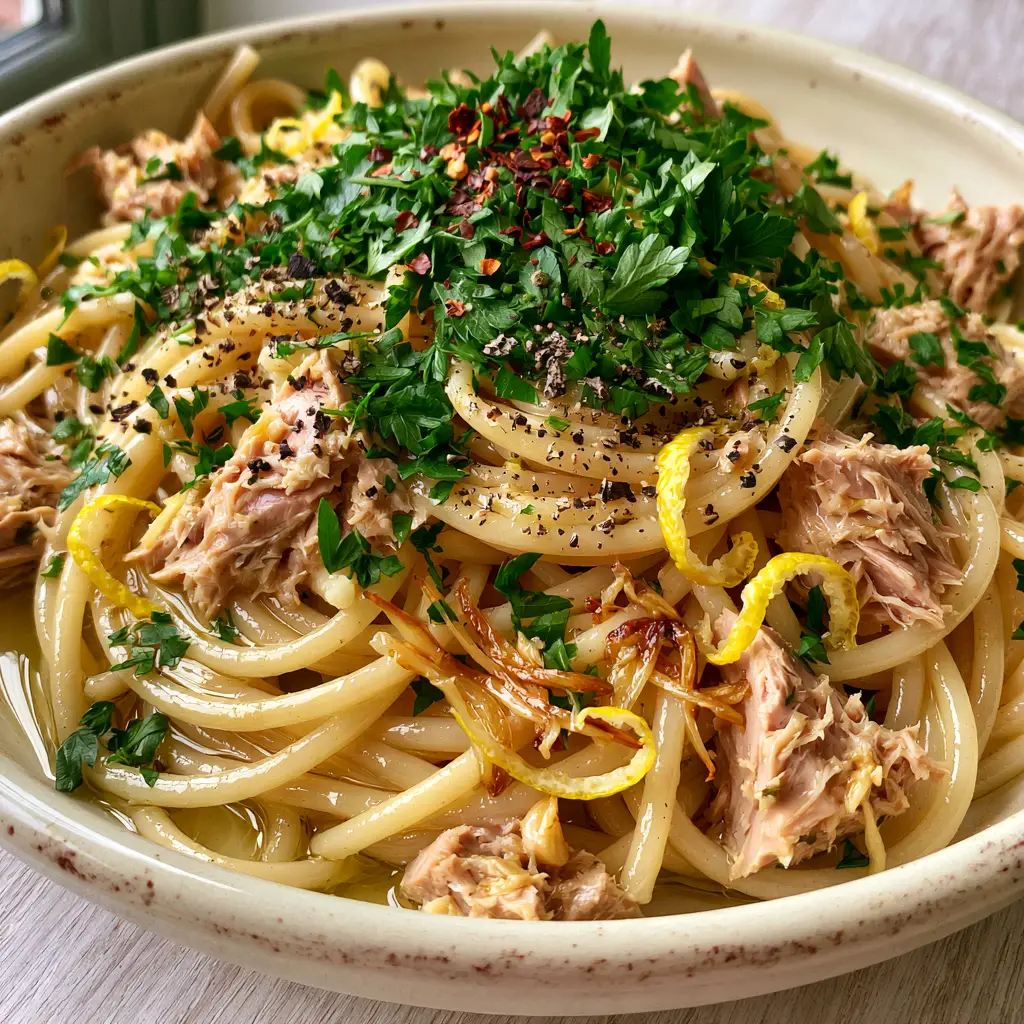
When you look at a bowl of this pasta, you aren’t seeing a mushy tuna casserole. Instead, you are greeted by moist, flaky tuna chunks that retain their integrity, nestled alongside golden-brown slivers of garlic. This dish is designed to be a sensory experience, catching the light on every oil-slicked curve of the spaghetti, exactly like a handheld smartphone photo taken in the soft side-lighting of a kitchen window.
Achieving this level of restaurant-quality finish requires more than just boiling water. It demands a forensic approach to heat management and ingredient timing. By the time you reach the bottom of your ceramic bowl, you will realize that the canned tuna pasta is the ultimate solution for home cooks who refuse to compromise on flavor even when the fridge is nearly empty.
The Secrets Behind This Glistening Mediterranean Masterpiece
- Textural Contrast: The marriage of firm, al dente spaghetti with moist, substantial flakes of tuna creates a satisfying mouthfeel that avoids the dreaded “mush.”
- Aromatic Depth: Sautéing garlic until it reaches a specific golden-brown sliver state provides a nutty sweetness that balances the salinity of the fish.
- Visual Vibrancy: Bright yellow lemon zest curls and a heavy scatter of finely chopped flat-leaf parsley provide a pop of color that signals freshness.
- The Emulsion Factor: We utilize “liquid gold” (starchy pasta water) to transform simple olive oil into a glossy, translucent sauce that clings to every strand.
The Ultimate Pantry Protein Palette: Ingredients and Substitutions
Spaghetti (450g / 1 lb): The long, thin profile of spaghetti is essential for capturing the lemon-garlic oil. If you are out of spaghetti, this tuna spaghetti recipe works beautifully with linguine or bucatini as well.
High-Quality Canned Tuna (2 cans, 140g/5oz each): Look for “solid light” or “albacore” tuna packed in olive oil for the moistest results. If using tuna in water, ensure you drain it thoroughly and add an extra tablespoon of oil to the pan to compensate for the lost moisture.
Extra Virgin Olive Oil (120ml / 1/2 cup): This is the base of your sauce, so use the good stuff. It provides the characteristic gloss and the fruity backbone that ties the lemon and garlic together.
Fresh Garlic (6 cloves): Instead of mincing, we are cutting these into thin slivers. This prevents the garlic from burning too quickly and creates those beautiful golden “chips” seen in the visual blueprint.
Lemon (1 large): We need both the juice for acidity and the zest for aromatic oils. Use a vegetable peeler to create those elegant yellow curls for a professional garnish.
Red Chili Flakes (1 tsp): This provides a controlled background heat. Adjust the amount based on your spice tolerance, but do not skip it, as it cuts through the richness of the oil.
Fresh Flat-Leaf Parsley (1 large bunch): Flat-leaf (Italian) parsley has a more robust flavor than curly parsley. Chop it finely to ensure it distributes evenly across the glossy pasta.
Coarse Cracked Black Pepper and Sea Salt: Use a coarse grind for the pepper to provide a visual and textural “punch.” Salt is essential both for the pasta water and the final seasoning.
Essential Tools for a Professional Finish
To achieve the “unfiltered, authentic” look of a gourmet food blog, you need a few specific tools. A large, heavy-bottomed stainless steel or cast-iron skillet is crucial for even heat distribution when sautéing the garlic. You will also need a microplane or a sharp vegetable peeler for the lemon zest curls, and a pair of tongs to properly emulsify the pasta into the sauce without breaking the tuna chunks.
Your Step-by-Step Path to Pasta Perfection
1. Achieving the Perfect Al Dente Foundation
Bring a large pot of heavily salted water to a rolling boil. Add your spaghetti and cook for 1-2 minutes less than the package instructions. We want the pasta to be slightly undercooked because it will finish “marrying” with the sauce in the skillet.
2. Sautéing the Garlic and Infusing the Oil
While the pasta boils, place your olive oil in a cold skillet and add the garlic slivers and chili flakes. Turn the heat to medium-low. This “cold start” allows the garlic to infuse the oil gradually without burning, turning it a perfect golden brown.
3. Incorporating the Tuna with Care
Once the garlic is golden and fragrant, add the drained tuna. Use a wooden spoon to gently break the tuna into large, moist flakes. Avoid over-stirring; we want distinct chunks of tuna distributed throughout the canned tuna pasta, not a uniform paste.
4. The Emulsion and Marriage
Using tongs, transfer the spaghetti directly from the water into the skillet. Add about 120ml (1/2 cup) of the starchy pasta water. Increase the heat to medium-high and toss vigorously. The starch will emulsify with the oil, creating a translucent, glistening coating on the pasta.
5. The Final Flourish of Brightness
Remove the pan from the heat. Fold in the finely chopped parsley, lemon juice, and those bright yellow lemon zest curls. Season generously with coarse cracked black pepper. The residual heat will soften the herbs just enough to release their aroma without losing their vibrant green color.
Expert Tips for Visual and Flavor Success
- Don’t Drain Too Much: If you are using oil-packed tuna, keep a teaspoon of that infused oil to add to the pan for an extra layer of savory fish flavor.
- Timing the Zest: Always add the lemon zest at the very end. High heat can turn zest bitter, but adding it off-heat preserves its floral, citrusy notes.
- The Pasta Water Rule: Never dump your pasta water until the dish is served. You may find you need an extra splash right before plating to restore that glossy sheen.
- Chunk Control: If you want the look of the “Extreme Close-Up” prompt, leave 30% of your tuna in larger, bite-sized nuggets rather than flaking it all down.
Maximizing Your Leftovers: Storage and Reheating
While this dish is best served immediately to maintain the “oil-slicked” texture, it can be stored in an airtight container for up to 2 days. To reheat, avoid the microwave, which can make the tuna rubbery. Instead, place it back in a skillet with a splash of water or extra olive oil over low heat until warmed through.
This recipe does not freeze well due to the delicate nature of the emulsified oil sauce and the texture of the pasta. For a different take on chilled fish and pasta, you might enjoy exploring a tuna pasta salad or a creamy tuna pasta salad for your next meal prep session.
What to Serve With Your Glistening Pasta
This dish is quite rich due to the olive oil, so it pairs perfectly with a crisp, acidic side dish. A simple arugula salad with a balsamic glaze works wonders. If you are looking for a more substantial Mediterranean spread, consider serving this alongside tonno alla siciliana for a true celebration of Italian tuna traditions.
For those who want to stick with the seafood theme but crave something creamy, you could pivot next time to a creamy tuna pasta or a comforting tuna pasta bake. To drink, a cold glass of Pinot Grigio or even a guava coconut margarita provides a tropical contrast to the lemon and garlic.
The Canned Tuna Pasta FAQ
Absolutely. While spaghetti is classic, linguine, fettuccine, or even short shapes like penne work well. Just ensure you cook it al dente.
Start the garlic in cold oil over medium-low heat. This allows the garlic to soften and turn golden slowly rather than scorching on the outside while remaining raw inside.
Tuna in olive oil is preferred for this recipe as it is more moist and flavorful. If you use tuna in water, drain it well and add a bit more extra virgin olive oil to the sauce.
Yes! It is packed with lean protein from the tuna and heart-healthy fats from the extra virgin olive oil, making it a balanced Mediterranean-style meal.
The secret is adding a splash of starchy pasta water to the olive oil and tuna in the skillet. Tossing them together over heat creates a glistening emulsion that clings to the pasta.
The Ultimate 15-Minute Canned Tuna Pasta Recipe
Canned Tuna Pasta with Searing Garlic, Lemon, and Chili
Ingredients
Equipment
Method
- Cook spaghetti in salted water until 1-2 minutes before al dente. Reserve 1 cup of pasta water before draining.
- Add olive oil, garlic slivers, and chili flakes to a cold skillet. Heat over medium-low until garlic is golden-brown and fragrant.
- Add the drained tuna to the skillet. Gently break into large flakes, ensuring they remain moist and distinct.
- Toss the pasta and reserved pasta water into the skillet. Increase heat and stir vigorously until a glossy, translucent sauce coats the strands.
- Remove from heat. Stir in parsley, lemon juice, and lemon zest curls. Top with coarse black pepper and serve immediately.
Notes
Always start your garlic in cold oil to prevent burning and maximize infusion.
Join the Amber Bakes Community!
This canned tuna pasta is a testament to the fact that great cooking doesn’t require expensive ingredients—just great technique. If you enjoyed this recipe, please leave a comment below and tell me how your garlic slivers turned out! Don’t forget to share your creations on Pinterest and tag me.
For more pantry-friendly inspirations and gourmet seafood ideas, sign up for our newsletter. You might also want to try our tuna tetrazzini for a nostalgic, cozy dinner tonight!