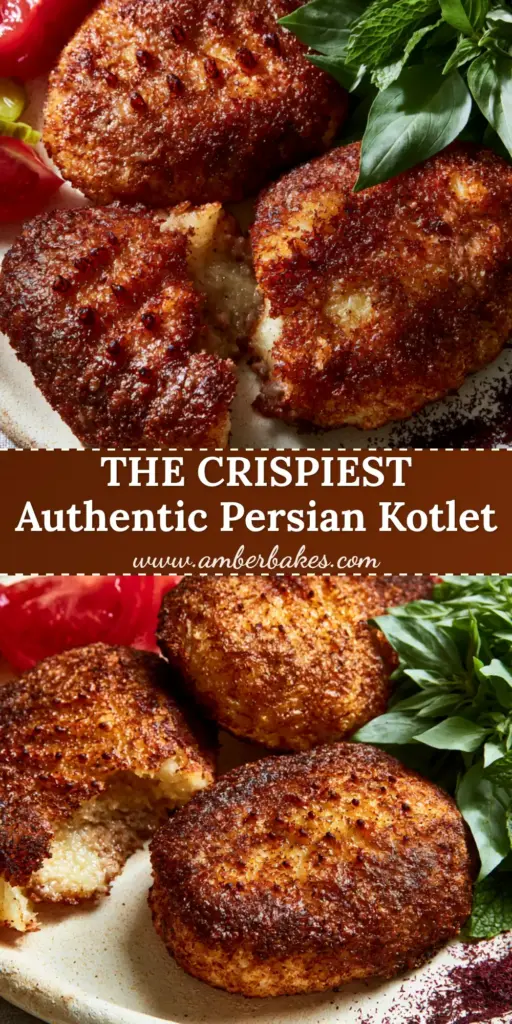
There is a specific sound in a Persian kitchen that signals comfort: the rhythmic sizzle of a Persian Kotlet hitting hot oil. This isn’t just a meat patty; it is a masterclass in textural contrast. Imagine a crust so golden and crisp it shatters under your fork, revealing a steaming, moist interior of savory beef and fluffy potatoes.
In this guide, we are diving deep into the art of the perfect Persian Kotlet. We will explore the science of potato starch, the importance of moisture control, and the exact garnishes—from tart sumac to salted Persian pickles—that elevate this dish from a simple meal to a culinary experience. Whether you are serving this for a family dinner or packing it for a picnic, these patties are the gold standard of Persian soul food.
Why This Crispy Persian Meat and Potato Patty Is a Game Changer
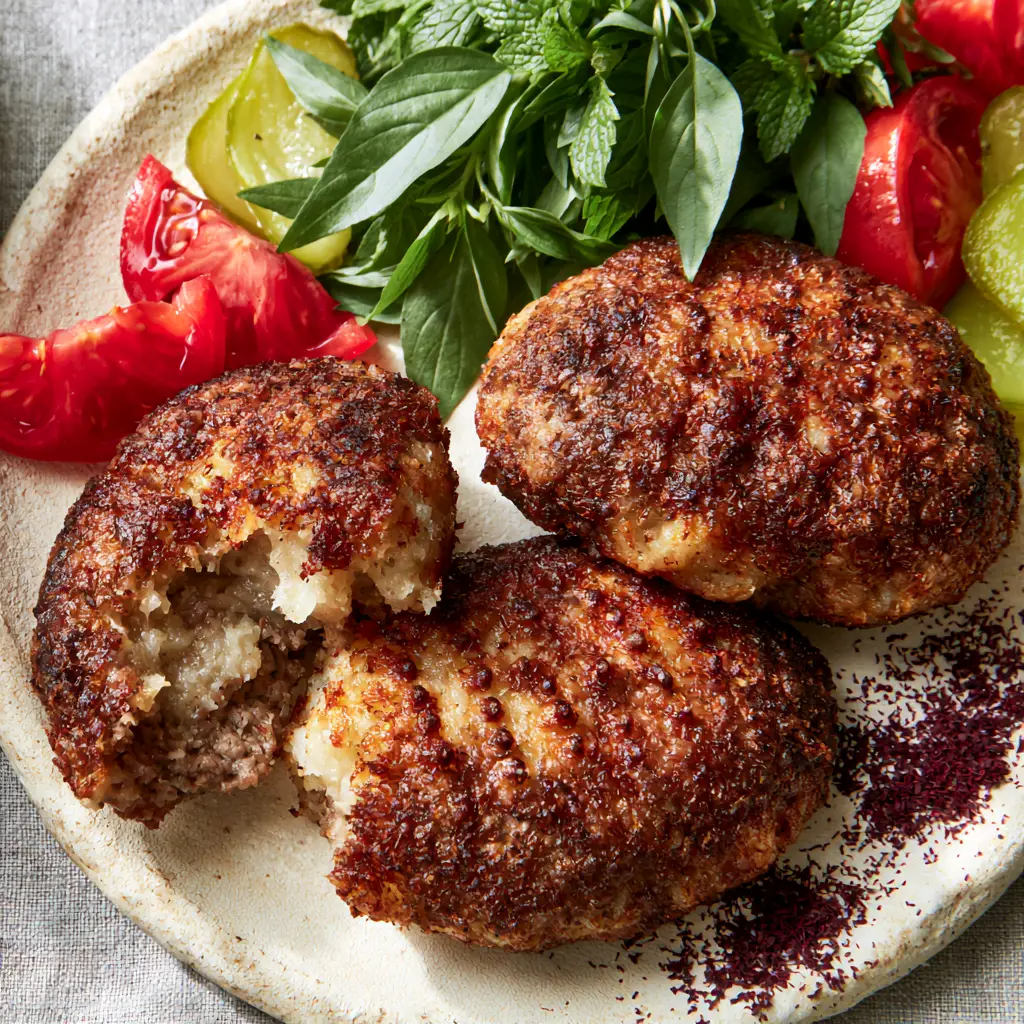
- The Signature Crunch: We utilize a specific grating technique to ensure a deep golden-brown, ultra-crispy textured crust with visible ridges.
- Steaming, Juicy Interior: By balancing the ratio of finely grated potatoes and ground beef, we achieve a light-colored, succulent center that melts in your mouth.
- Aromatic Depth: The inclusion of traditional spices and a final dusting of deep burgundy sumac powder provides a complex, tangy finish.
- Visual Elegance: This recipe is designed to look stunning on a matte ceramic platter, surrounded by vibrant red tomatoes and emerald-green herbs.
The Anatomy of a Perfect Persian Meat Patty: Essential Ingredients
To achieve the visual and textural results seen in our professional food photography, every ingredient serves a structural and flavor-based purpose. We don’t just season; we build layers of taste.
Lean Ground Beef: Use 1 lb (450g) of 85/15 lean ground beef. This provides enough fat for a juicy interior without making the patties greasy or causing them to shrink excessively during the pan-frying process.
Russet Potatoes: You will need 1.5 lbs (680g) of potatoes. Russets are high in starch, which is the secret to that “light-colored interior” and the structural integrity that allows for those beautiful pan ridges.
Yellow Onion: One medium (150g) onion, grated finely. The juices from the onion tenderize the beef, while the solids caramelize against the potato starch to create a savory depth.
Large Eggs: 2 large eggs act as the primary binder. They emulsify the fats and starches, ensuring your patties don’t crumble when they hit the high heat of the skillet.
Ground Turmeric: 1 tsp (5g) of turmeric is non-negotiable. It provides the signature warm hue and an earthy backbone that complements the fried potato flavor perfectly.
Neutral Frying Oil: High-quality grapeseed or vegetable oil is required for searing. You need an oil with a high smoke point to achieve that deep golden-brown crust without burning the spices.
Saffron Water (Optional but Recommended): A teaspoon of brewed saffron adds a luxurious aroma that pairs beautifully if you are serving this alongside Persian Saffron Chicken for a larger feast.
The Garnish Spread: Vibrant red vine tomatoes, salted Persian pickles (خیارشور), fresh mint sprigs, and lush Persian basil. These provide the acidic and herbal counterpoints to the rich, fried meat.
Ground Sumac: A generous dusting of deep burgundy sumac powder. Its citrusy, astringent profile cuts through the oil and brightens the entire palate.
The Essential Tools for Professional Results
To replicate the “high-quality handheld smartphone photo” look, your tools must allow for precision. You aren’t just cooking; you are crafting a visual masterpiece.
A heavy-bottomed non-stick or cast-iron skillet is mandatory. This ensures even heat distribution, which is how we get that “oil-glistening crunch” without hot spots burning the exterior.
A fine-mesh grater or a food processor with a fine grating disc is needed for the potatoes. The texture must be consistent to ensure the interior remains “finely grated” and “moist” rather than chunky.
A clean kitchen towel or cheesecloth is perhaps the most important tool. You will use this to wring every drop of excess moisture from the grated potatoes and onions—a step that separates amateur Kotlet from the elite version.
Step-by-Step Instructions for the Perfect Persian Kotlet
Preparing the Potato and Onion Base
Start by peeling your 1.5 lbs (680g) of russet potatoes. Grate them using the fine side of your grater into a large bowl. Repeat this process with the medium yellow onion.
Transfer the grated mixture into a cheesecloth. Squeezing with all your might, remove the liquid until the pulp is bone-dry. This step is critical; if the mixture is too wet, the patties will steam instead of fry, and you will lose that ultra-crispy texture.
Incorporating the Meat and Spices
In a large mixing bowl, combine the dried potato and onion pulp with 1 lb (450g) of ground beef. Add 2 eggs, 1 tsp (5g) turmeric, 1.5 tsp (9g) sea salt, and 1 tsp (5g) black pepper.
Knead the mixture by hand for at least 5 minutes. You are looking for a tacky, homogenous paste. This physical manipulation develops the proteins, ensuring the patties hold their oval shape during frying.
Shaping and Creating the Signature Ridges
Divide the mixture into golf-ball-sized portions. Flatten them into ovals approximately 1/2 inch (1.25cm) thick. Use your fingertip or a fork to press slight ridges into the surface—this increases the surface area for maximum crunch.
If you enjoy a variety of textures in your Persian spreads, you might notice the shaping technique is similar to the base of Persian Chicken Kabob, though the starch content here makes the Kotlet much heartier.
The Art of the Perfect Pan-Fry
Heat 1/2 cup (120ml) of oil in your skillet over medium-high heat. Wait until the oil shimmers. Carefully slide the patties into the pan, being careful not to overcrowd them.
Fry for 5-7 minutes per side. Watch for the visual cue: the edges should turn a deep mahogany brown before you flip. The final result should be a deep golden-brown, ultra-crispy crust that glistens slightly in the light.
Assembling the Matte Ceramic Platter
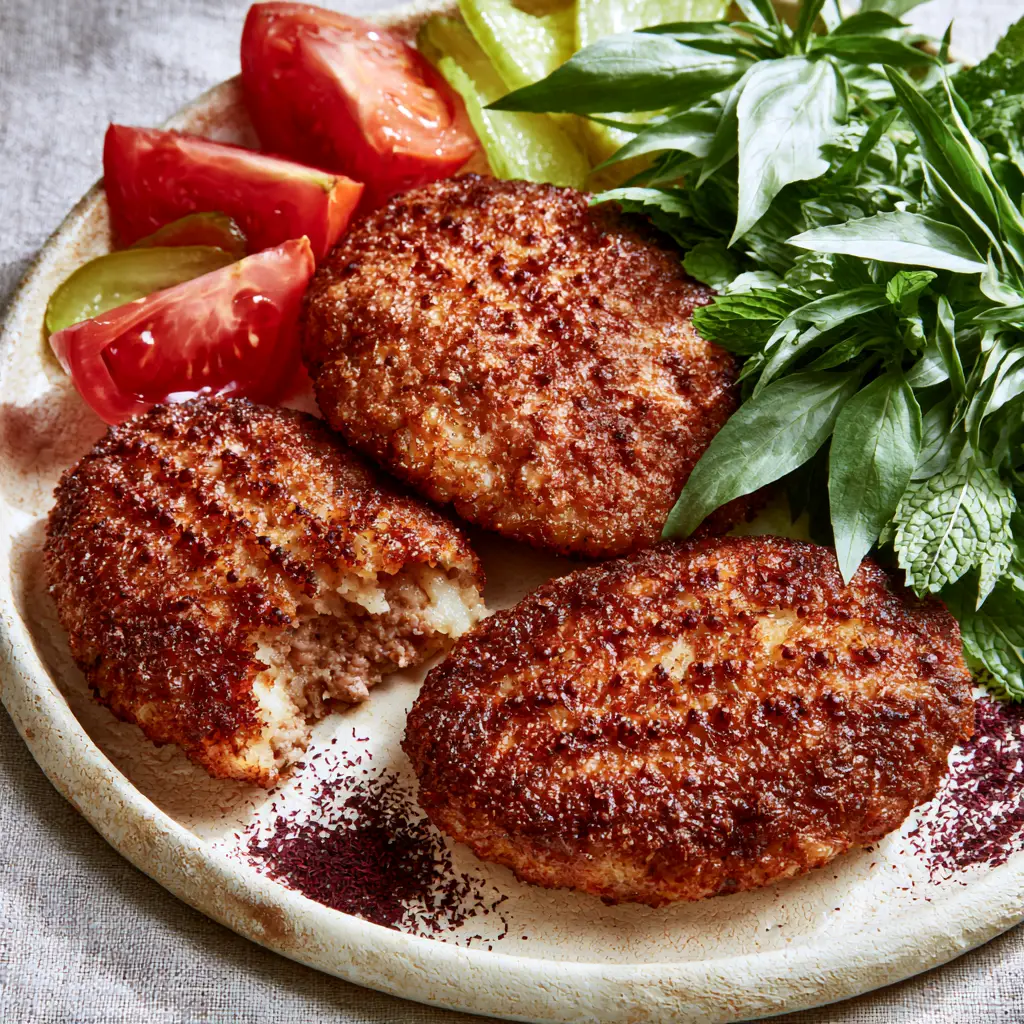
Drain the finished Kotlets on a wire rack—not paper towels—to keep the bottom crispy. Arrange three oval patties on a rustic, matte cream-colored ceramic plate.
Surround the meat with thick slices of bright red vine tomatoes and thin spears of salted Persian pickles. Heap fresh emerald-green Persian basil and mint leaves to one side. Finally, scatter a light dusting of burgundy sumac across the plate and the patties themselves.
Expert Tips for Visual and Flavor Success
- Cold Potatoes: If using boiled potatoes (a common variation), ensure they are completely cold before grating. Warm potatoes will turn into a gummy mash, ruining the “steaming, juicy interior.”
- The Squeeze Test: After squeezing your potatoes, the remaining starch (the white powder at the bottom of the liquid bowl) can be added back into the meat for extra crispiness.
- Oil Temperature: If the oil isn’t hot enough, the patty will absorb it and become heavy. Always test with a tiny piece of the mixture; it should sizzle violently upon contact.
- Fresh Herbs: Never use dried mint or basil for the garnish. The “lush heap” of greens mentioned in our visual blueprint requires the turgor pressure and vibrant color of fresh sprigs.
Storage, Reheating, and Freezing
Persian Kotlets are famous for being delicious even when cold, which is why they are often tucked into sandwiches. Store leftovers in an airtight container for up to 3 days in the refrigerator.
To reheat and preserve the crunch, use an air fryer at 350°F (175°C) for 4 minutes or a dry skillet over medium heat. Avoid the microwave, as it will make the crust soggy.
You can freeze the uncooked patties by layering them between parchment paper in a freezer bag. They will stay fresh for up to 2 months. Fry them directly from frozen, adding 2 minutes to each side of the cooking time.
What to Serve With Persian Kotlet
While these patties are a meal in themselves when tucked into a baguette with mayo and pickles, they shine as part of a larger Persian feast. Pair them with Persian Jeweled Rice for a festive occasion, or serve them alongside a refreshing Tuna Pasta Salad for a modern fusion lunch.
For those who love a variety of textures, placing these crispy patties next to a creamy bowl of Creamy Tuna Pasta provides a delightful contrast between the crunchy meat and the soft, saucy noodles.
Frequently Asked Questions
Both work! Raw potatoes create a crispier, more textured crust, while boiled (and cooled) potatoes result in a smoother, more cake-like interior.
Yes, this specific recipe is naturally gluten-free as it uses potatoes as the primary binder instead of breadcrumbs or flour.
Ensure your oil is hot (shimmering) before adding the patties and use a high-starch potato like a Russet. Turmeric also helps achieve that signature golden hue.
This usually happens due to excess moisture in the grated potatoes or onions. Ensure you wring them out completely using a cheesecloth until they are dry to the touch.
The Definitive Crispy Persian Kotlet Recipe
Persian Kotlet: The Ultimate Crispy Potato and Meat Patties
Ingredients
Equipment
Method
- Finely grate the potatoes and onion. Use a cheesecloth to squeeze out every drop of excess liquid until the pulp is dry.
- Combine beef, potato/onion pulp, eggs, turmeric, salt, and pepper. Knead for 5 minutes until a tacky paste forms.
- Shape into ovals 1/2 inch thick and press ridges into the surface with a fork for extra texture.
- Heat oil until shimmering. Fry patties for 5-7 minutes per side until deep golden brown and crispy.
Notes
Use cold boiled potatoes if you prefer a smoother interior texture.
Join the Persian Culinary Journey
The Persian Kotlet is more than just a recipe; it is a gateway into a world of balanced flavors and exquisite textures. The combination of the “oil-glistening crunch” and the “steaming moist interior” is something every home cook should experience at least once. We hope this guide helps you achieve that perfect, window-lit glow on your own matte ceramic platter.
Did you master the golden crust? We want to see your results! Tag us in your photos and follow us on Pinterest for more culinary inspiration. Don’t forget to sign up for our newsletter to receive weekly recipes that bridge the gap between professional food photography and home-cooked reality.