There is something undeniably nostalgic about sneaking a bite of raw cookie dough from the mixing bowl. These chocolate chip cookie dough cheesecakes take that childhood indulgence and elevate it into a sophisticated, multi-layered dessert that looks as incredible as it tastes.
Imagine a thick, buttery graham cracker crust topped with a dense, velvety white cream cheese filling. Inside that filling, you discover hidden treasures of edible cookie dough and glistening mini semi-sweet chocolate chips that pop against the ivory backdrop.
This eye-level stack of mini square bites is the ultimate crowd-pleaser. With a soft, gooey center revealed in every bite and a crowning dollop of fresh whipped cream, this recipe is designed for those who demand both professional aesthetics and deep, home-style flavor.
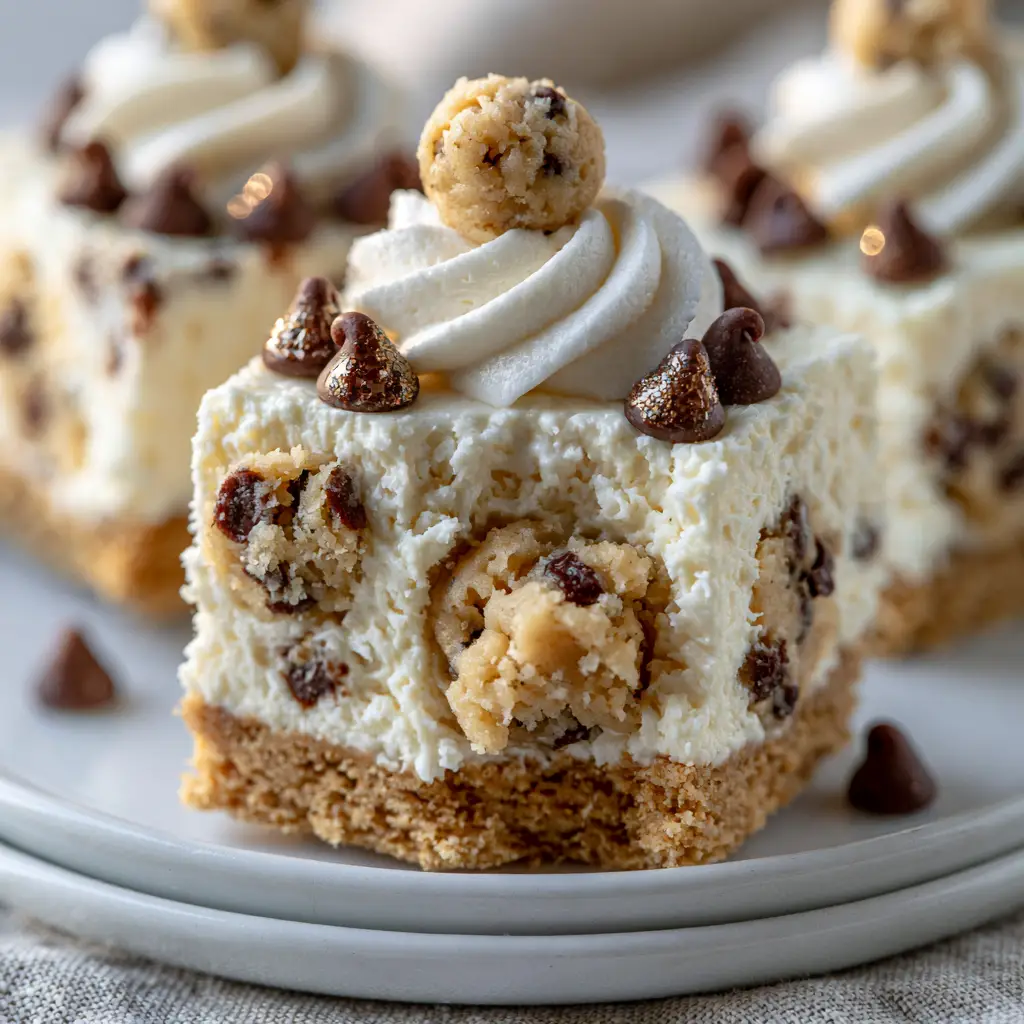
Why You Will Crave These Cookie Dough Cheesecake Squares
- The Perfect Contrast: A crunchy, pressed graham cracker base paired with a silky-smooth cream cheese texture.
- Guilt-Free Raw Dough: We use heat-treated flour and no eggs to ensure the cookie dough chunks are completely safe and deliciously gooey.
- Visual Masterpiece: Designed to look like a handheld smartphone photo from a high-end bakery, featuring glistening chips and perfect spheres of dough garnish.
- No-Bake Ease: Skip the oven and the water bath; these cheesecakes set perfectly in the refrigerator for a stress-free hosting experience.
Essential Ingredients for Chocolate Chip Cookie Dough Cheesecakes
Creating a stable, sliceable mini cheesecake requires the right balance of fats and solids. Each ingredient serves a specific culinary purpose to achieve that high-resolution visual result.
For the Edible Cookie Dough Chunks:
- 1 cup (125g) All-Purpose Flour: Must be heat-treated to eliminate bacteria while providing the necessary structure for the dough spheres.
- 1/2 cup (115g) Unsalted Butter: Softened to a cream-like consistency to hold the sugars and flour together.
- 1/2 cup (100g) Light Brown Sugar: Packed for that deep molasses flavor characteristic of classic cookies.
- 1/4 cup (50g) Granulated Sugar: Adds sweetness and helps create the soft, slightly grainy texture of real dough.
- 2 tbsp (30ml) Whole Milk: The liquid binder that replaces eggs, ensuring the center remains soft and gooey.
- 1/2 tsp (3g) Fine Sea Salt: A critical “invisible” ingredient that cuts through the sugar and enhances the chocolate.
- 1/2 cup (85g) Mini Semi-Sweet Chocolate Chips: Their small size ensures you get chocolate in every single bite without overwhelming the dough.
For the Velvety Cheesecake Filling:
- 16 oz (450g) Full-Fat Cream Cheese: Must be brick-style and at room temperature to ensure a velvety, lump-free filling.
- 1/2 cup (100g) Granulated Sugar: Sweetens the cream cheese without adding the grit often found in lower-quality recipes.
- 1 cup (240ml) Heavy Whipping Cream: Whipped to stiff peaks and folded in to provide the airy, mousse-like density seen in the cross-section.
- 1 tsp (5ml) Pure Vanilla Extract: Provides the floral aroma that bridges the gap between the crust and the filling.
- 1/2 cup (85g) Mini Semi-Sweet Chocolate Chips: These should glisten against the white filling for maximum visual appeal.
For the Buttery Graham Crust:
- 1.5 cups (150g) Graham Cracker Crumbs: Finely ground to create a thick, stable golden base that won’t crumble when sliced.
- 6 tbsp (85g) Unsalted Butter, Melted: The “glue” that transforms crumbs into a solid, buttery foundation.
- 1 tbsp (13g) Sugar: Helps the crust slightly caramelize and bind together during the chilling process.
Essential Kitchen Tools for Square Cheesecake Perfection
To achieve the sharp, professional square edges seen in our visual blueprint, you need the right equipment. A 9×9 inch (23x23cm) square baking pan is non-negotiable for these bites.
Line your pan with parchment paper, leaving an overhang on the sides. This “sling” allows you to lift the entire block out for clean slicing once the cheesecake has chilled and set firmly.
You will also need a high-powered hand mixer or stand mixer to aerate the cream cheese. This ensures the filling is dense enough to hold the cookie dough chunks in suspension without them sinking to the bottom.
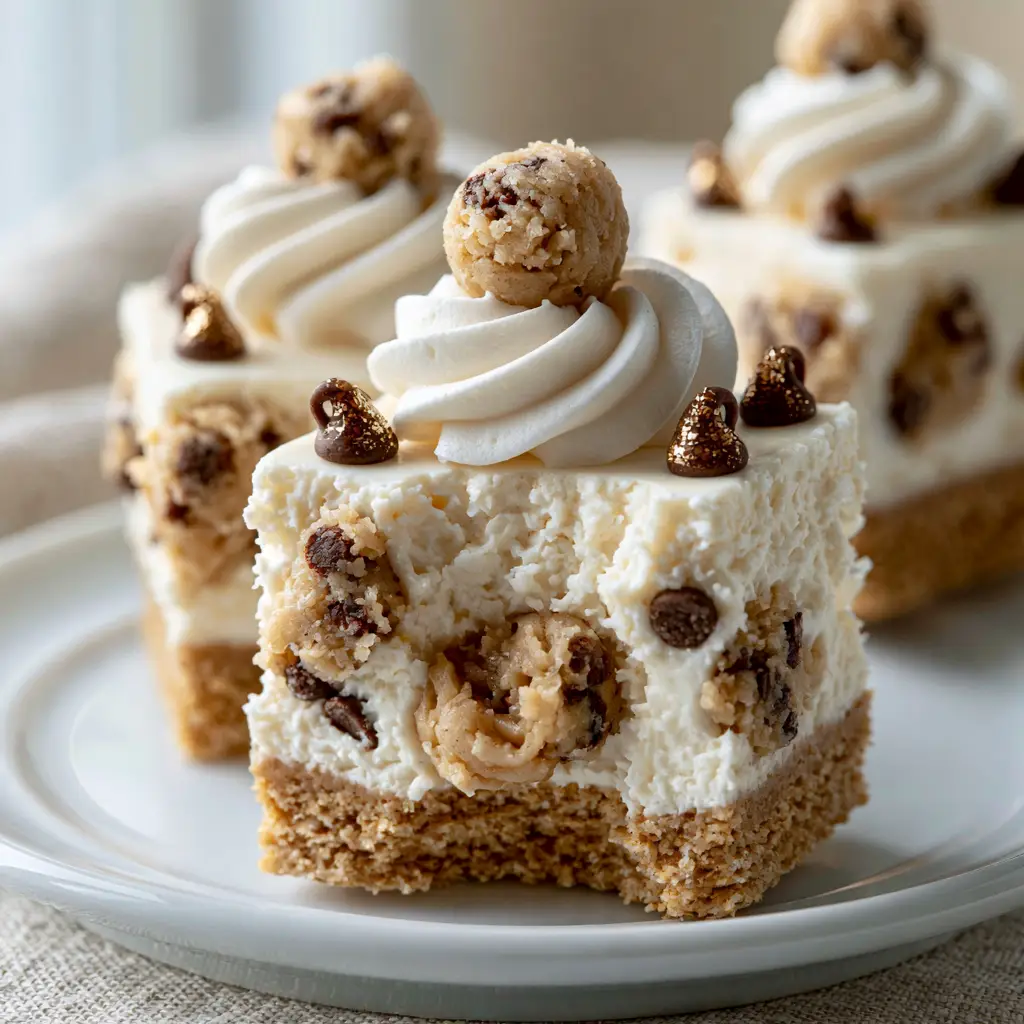
Mastering the Texture of Chocolate Chip Cookie Dough Cheesecakes
Phase 1: Preparing the Safe Edible Cookie Dough
First, heat-treat your flour by spreading it on a tray and baking at 350°F (175°C) for 5-7 minutes until it reaches 160°F (71°C). Allow it to cool completely before proceeding.
Cream the butter and sugars until light and fluffy. Mix in the milk, vanilla, and salt, then fold in the heat-treated flour and mini chocolate chips. Roll half of the dough into tiny spheres for the garnish and crumble the rest into larger chunks for the filling.
Phase 2: Building the Buttery Foundation
Combine the graham cracker crumbs, melted butter, and sugar in a medium bowl. The texture should resemble wet sand that holds its shape when squeezed in your palm.
Press the mixture firmly into the bottom of your lined pan. Use the flat bottom of a measuring cup to ensure the crust is even and packed tightly; this prevents a crumbly mess when you take that first bite.
Phase 3: Crafting the Velvety White Filling
Beat the room-temperature cream cheese and sugar until perfectly smooth—look for a glossy, satin-like finish. In a separate bowl, whip the heavy cream to stiff peaks.
Gently fold the whipped cream into the cheese mixture, followed by the mini chocolate chips and the cookie dough chunks. The goal is a thick, velvety filling that looks packed with visible treasures.
Phase 4: Assembly and Visual Finishing
Spread the filling over the crust, smoothing the top with an offset spatula. Chill in the refrigerator for at least 4 hours, or preferably overnight, to let the flavors meld and the structure solidify.
Before serving, lift the cheesecake out and cut into even squares. Top each square with a generous dollop of whipped cream and a single sphere of raw cookie dough garnish as per the visual recipe blueprint.
Expert Secrets for Dessert Success
- Temperature Control: Ensure your cream cheese is truly at room temperature. Cold cream cheese will result in tiny white lumps that ruin the velvety mouthfeel.
- Clean Slicing: For those professional-looking square bites, dip your knife in hot water and wipe it clean between every single cut.
- Mini Chips Only: Large chocolate chips can be difficult to bite through when cold. Mini chips provide a delicate crunch and glisten better under natural window light.
- Salt is Key: Don’t skip the sea salt in the dough; it acts as a flavor bridge, making the chocolate taste “more like chocolate.”
How to Store and Preserve Your Cheesecake Bites
These mini cheesecakes are best served chilled directly from the refrigerator. You can store them in an airtight container for up to 5 days without losing the integrity of the whipped cream dollop.
If you want to prep ahead, these squares freeze beautifully. Flash-freeze them on a tray for an hour before transferring to a freezer bag. Simply thaw in the fridge for 2 hours before serving to maintain that soft, gooey center.
What to Serve with Your Decadent Cheesecake Squares
Because these cheesecakes are rich and indulgent, they pair perfectly with a light, fruit-forward dessert like a refreshing mango dessert to cleanse the palate. If you are serving these at a brunch, consider a colorful watermelon smoothie bowl for a vibrant contrast.
For a full menu, follow a savory roasted sweet potato salad with these bites. If you enjoy Mediterranean flavors, a dip of creamy tzatziki sauce and pita makes a great appetizer before diving into the heavy chocolate chip cookie dough cheesecakes.
Frequently Asked Questions
Absolutely! They freeze very well for up to 3 months. Thaw them in the refrigerator for a few hours before serving to maintain their velvety texture.
The secret is to chill the cheesecake overnight so it is fully set, then use a sharp knife dipped in hot water and wiped dry between every single cut.
Yes! We use heat-treated flour and omit eggs in the cookie dough chunks, making it completely safe to consume ‘raw’ within the cheesecake filling.
Lumps occur if the cream cheese is too cold. Ensure it is fully softened to room temperature before mixing, and always beat the cheese and sugar until glossy before adding other ingredients.
Mini chips provide a better distribution of chocolate in every bite and offer a more delicate texture that won’t become unpleasantly hard when the cheesecake is chilled.
The Final Reward: Homemade Cookie Dough Bliss
Mastering these chocolate chip cookie dough cheesecakes is a journey into culinary textures. From the snap of the glistening chocolate chips to the velvety density of the filling, every element is designed to satisfy the most demanding sweet tooth.
Whether you are looking for a show-stopping party treat or a personal indulgence, these mini bites deliver the perfect bridge between a classic cookie and a luxury cheesecake. The natural window light hitting the glistening chips and the soft focus of the background make this a dish you’ll want to photograph before you devour.
If you loved this recipe, please leave a comment below and share your results! Don’t forget to follow amber_bakes on Pinterest for more decadent visual recipe inspiration.

Chocolate Chip Cookie Dough Cheesecakes: The Ultimate No-Bake Mini Bites
Ingredients
Equipment
Method
- Toast flour at 350°F (175°C) for 5 minutes until it reaches 160°F (71°C) to make it safe for raw consumption.
- Cream butter and sugars, add milk and vanilla, then stir in flour, salt, and mini chips. Roll small garnish spheres and crumble the rest.
- Mix graham crumbs, melted butter, and sugar. Press firmly into a 9x9 lined pan.
- Beat cream cheese and sugar until smooth. Fold in whipped cream, mini chips, and cookie dough chunks.
- Spread over crust, chill 4+ hours. Slice into squares and garnish with whipped cream dollops and dough spheres.
Notes
Dip your knife in hot water between slices for clean, professional edges.